> For the complete documentation index, see [llms.txt](https://docs.ohmautomation.io/llms.txt). Markdown versions of documentation pages are available by appending `.md` to page URLs; this page is available as [Markdown](https://docs.ohmautomation.io/en/ios/guide/irrigation.md).
# Irrigation
The main features to take care of your garden, wherever you are.
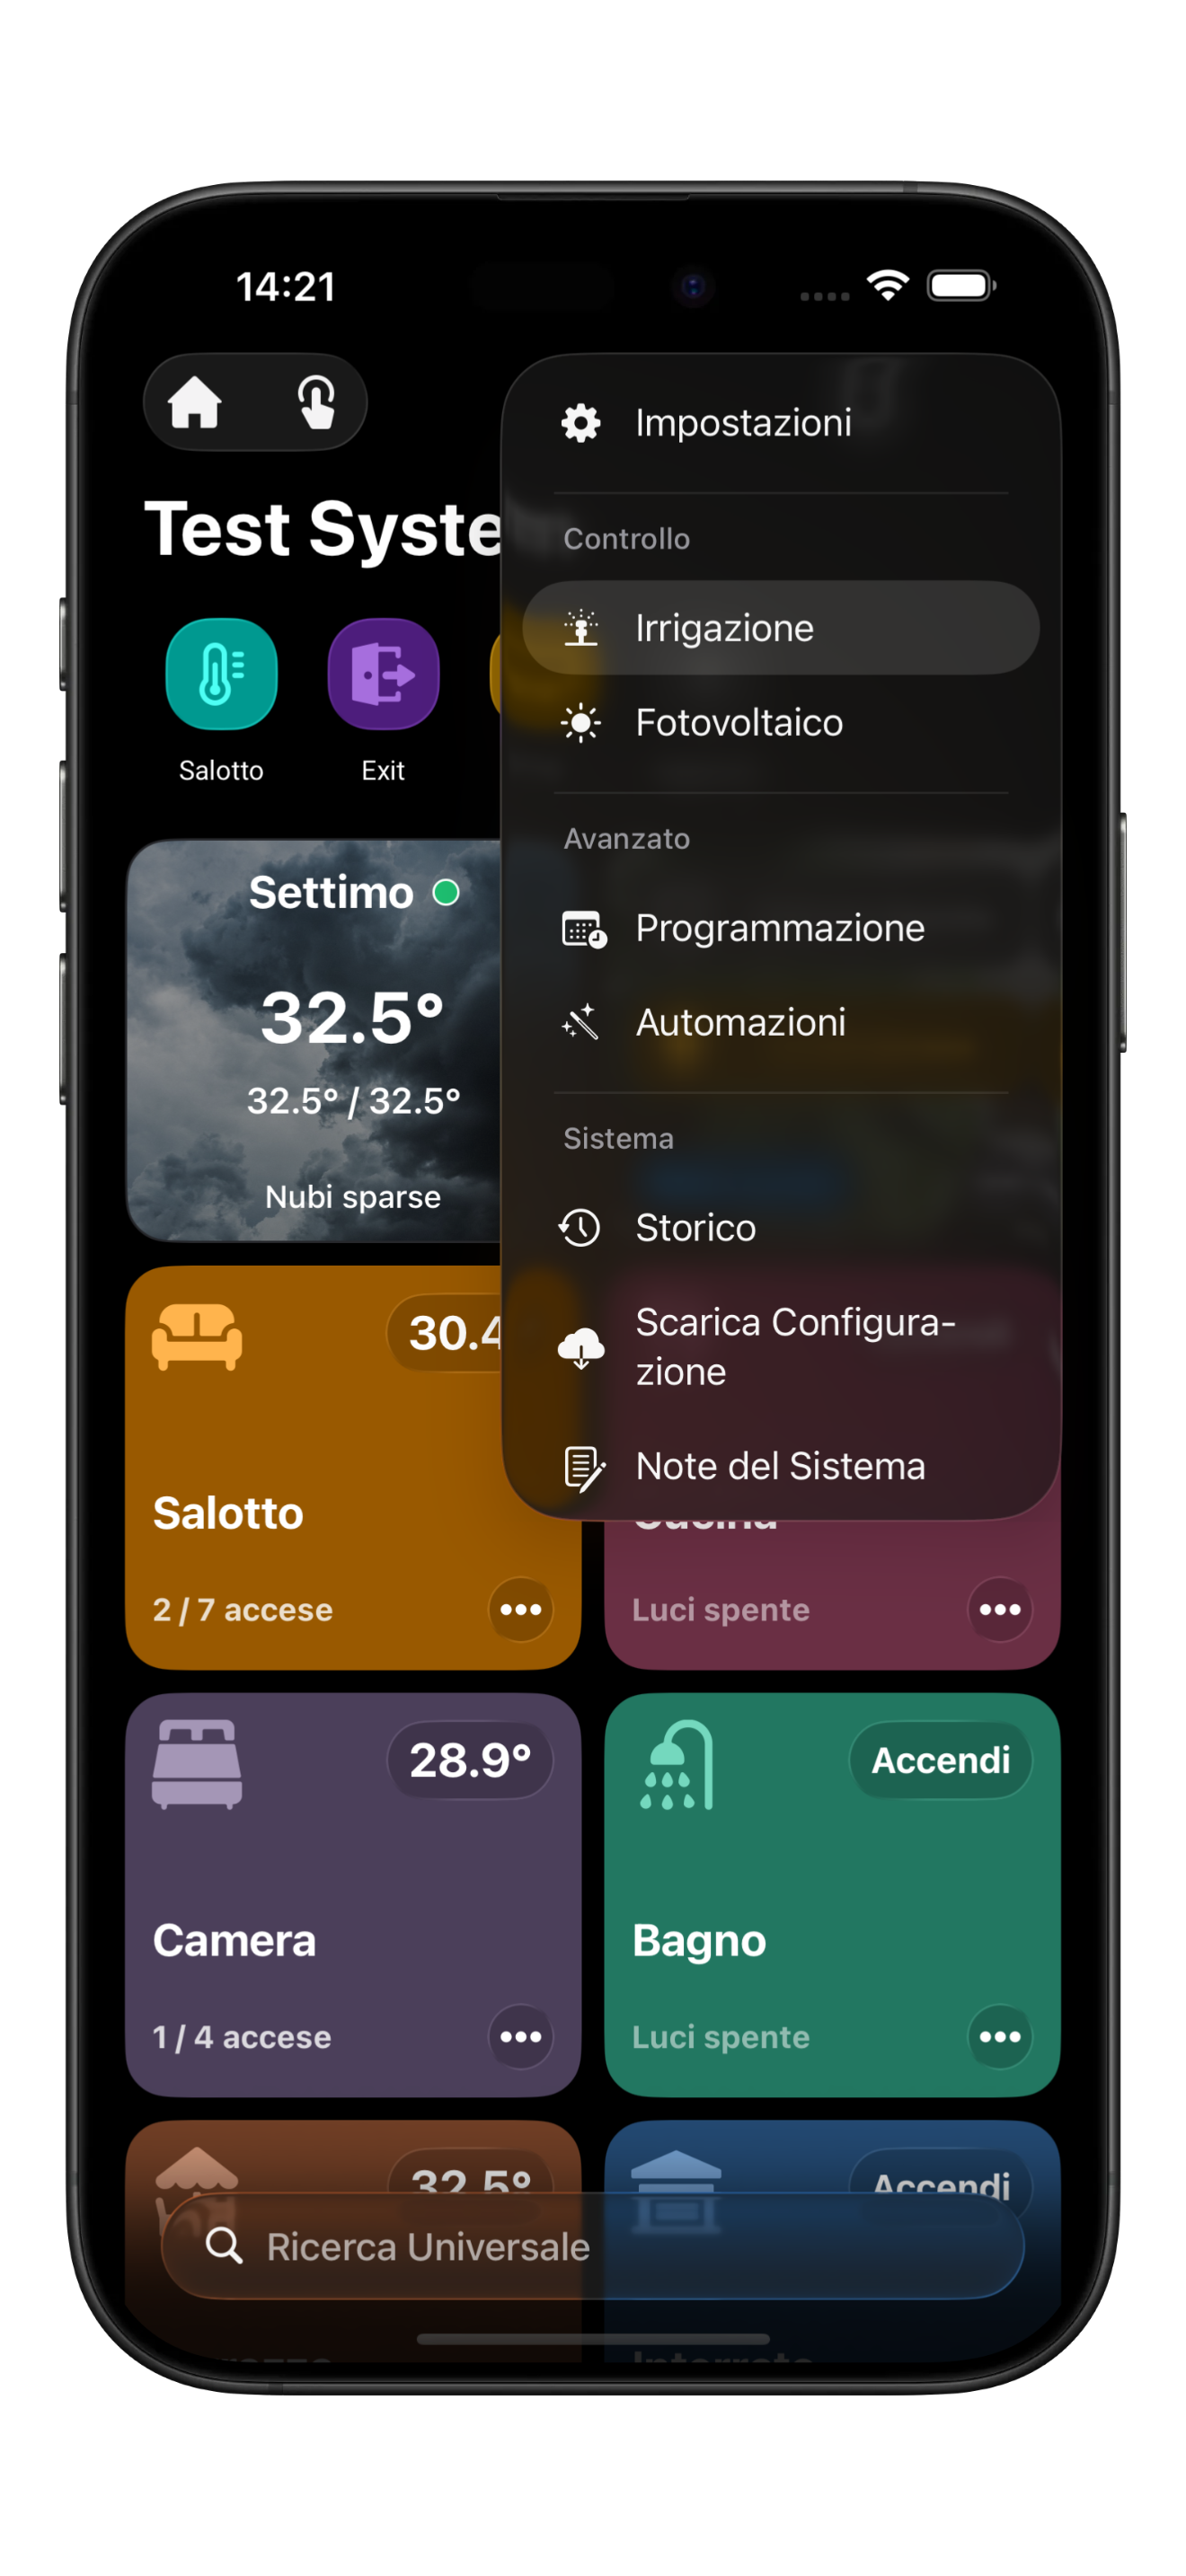
To access the Irrigation System, simply tap the three dots in the top right corner, then select the *Irrigation* option.
## The Basics
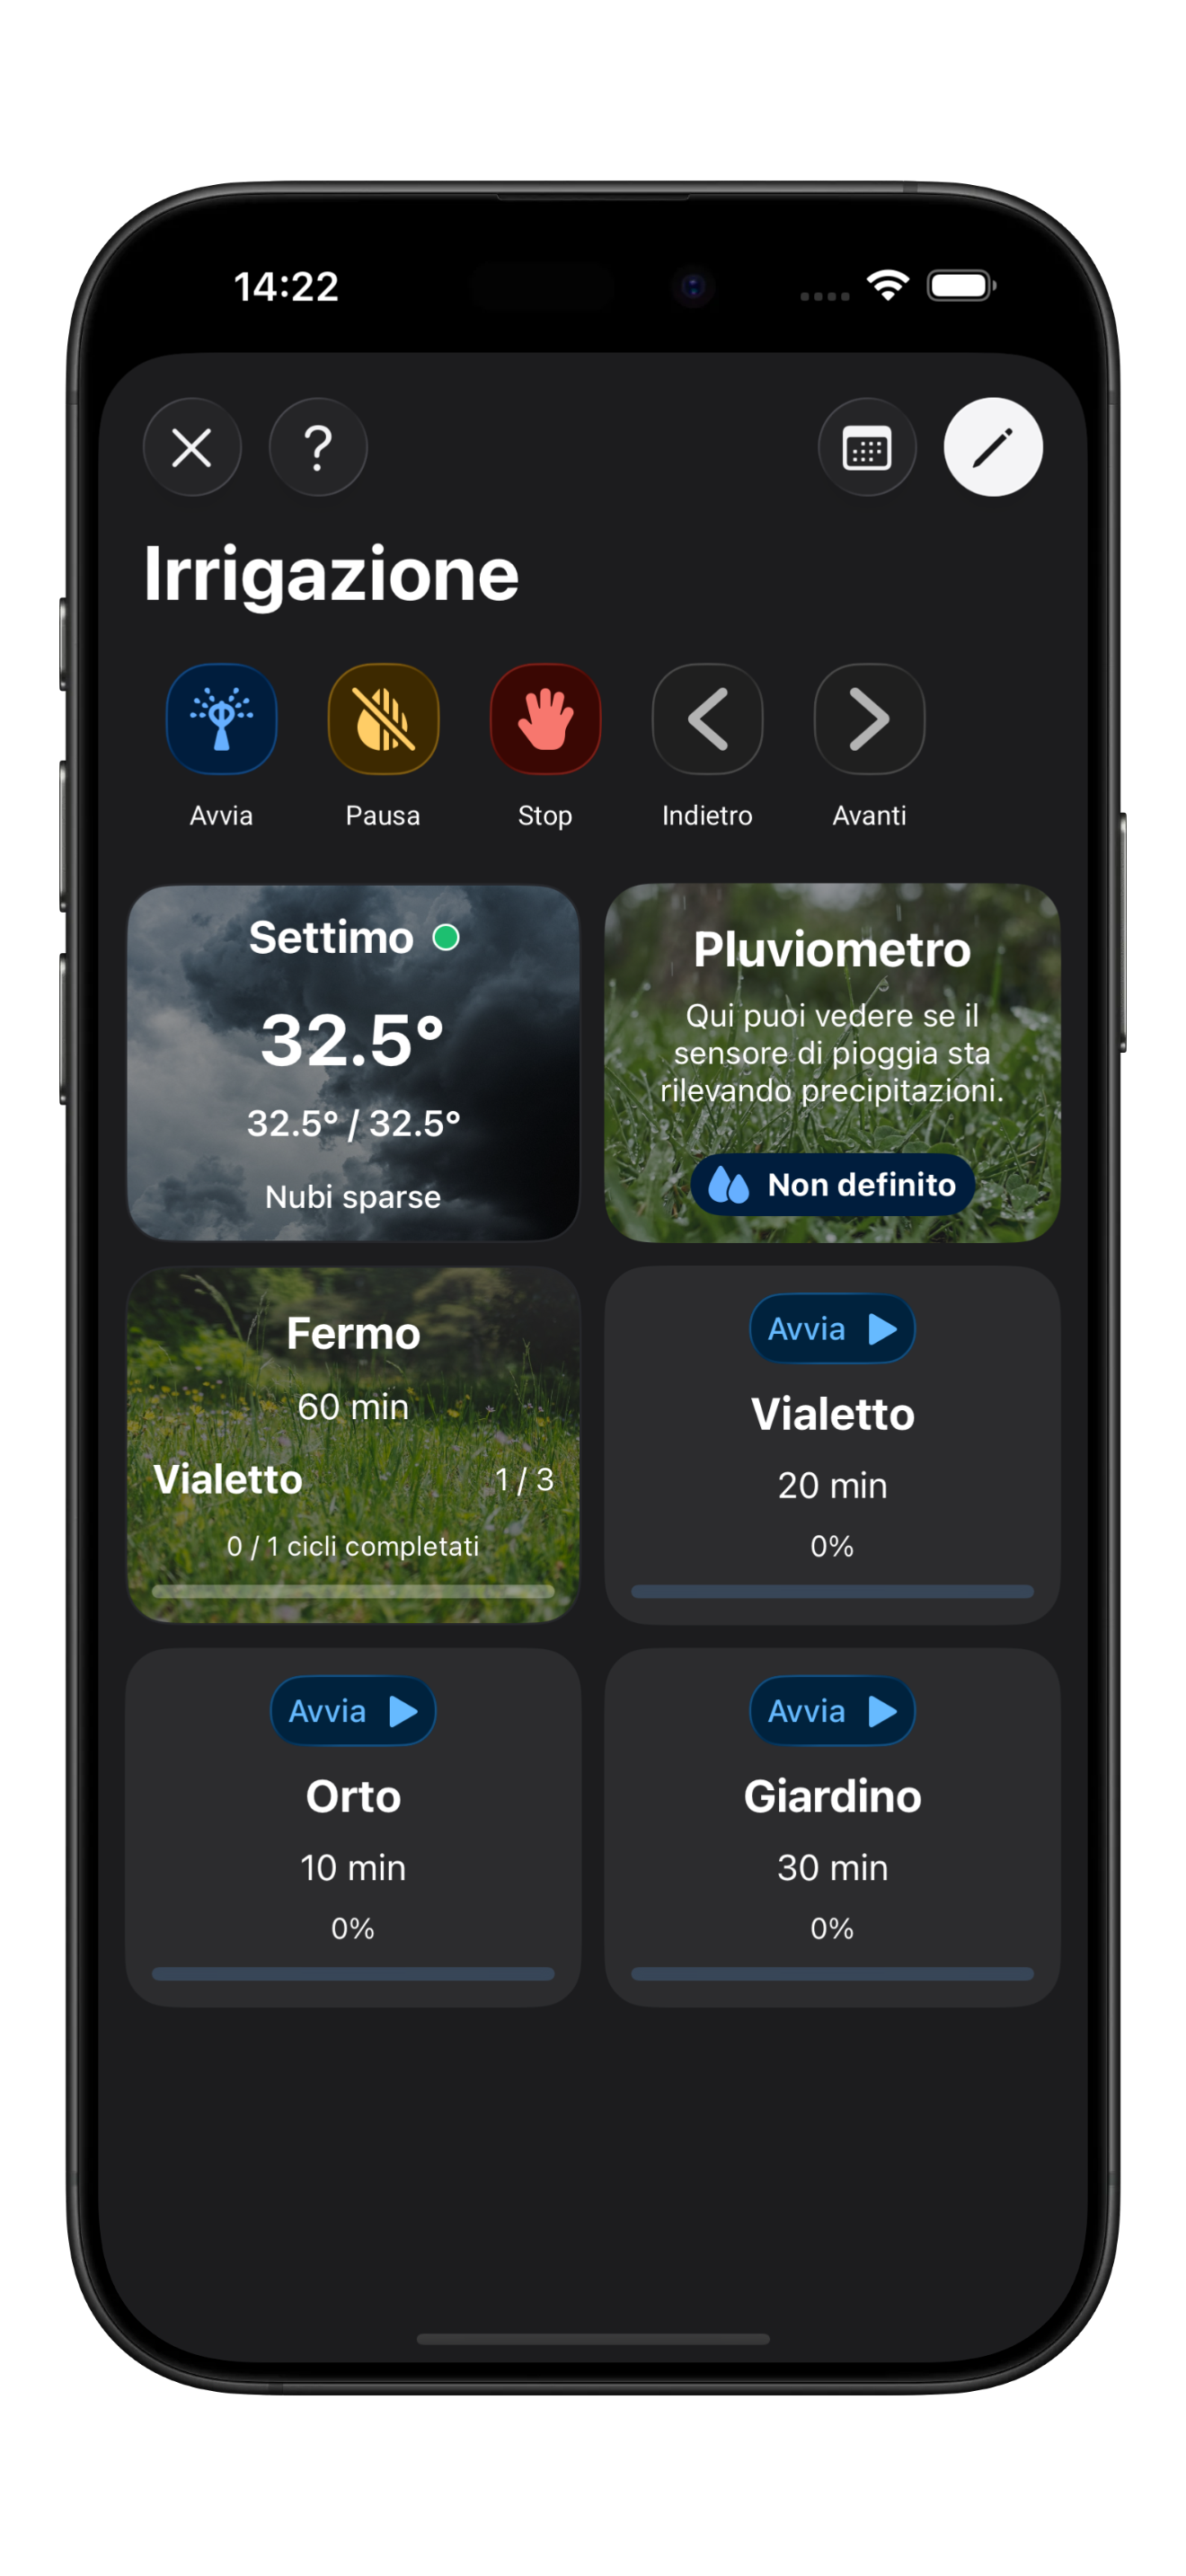
Managing irrigation is a bit like listening to music; the main buttons are:
* **Start:** tap the blue button with the sprinkler icon to start the irrigation cycle.
* **Pause:** did you forget to move something off the lawn? Temporarily pause the cycle by tapping the yellow button. Tapping *Start* again resumes the cycle from where it was paused.
* **Stop:** with the red button, you can stop the cycle completely. Tapping *Start* again restarts the cycle from the beginning.
* **Back / Forward:** these two buttons let you go back to the previous phase or move to the next one.
{% hint style="info" %}
We talked about an *irrigation cycle* because it is essential to divide the garden into zones to ensure adequate system pressure and proper water distribution. Each zone corresponds to a specific cycle phase.
{% endhint %}
In addition to the main buttons, these are the elements you will find on the page:
* **Weather Forecast:** useful when you are away from home to avoid watering when it is raining.
* **Rain Gauge:** if you have installed a rain sensor, you can check the condition of your lawn; the system will automatically avoid starting the irrigation cycle if the garden is sufficiently moist.
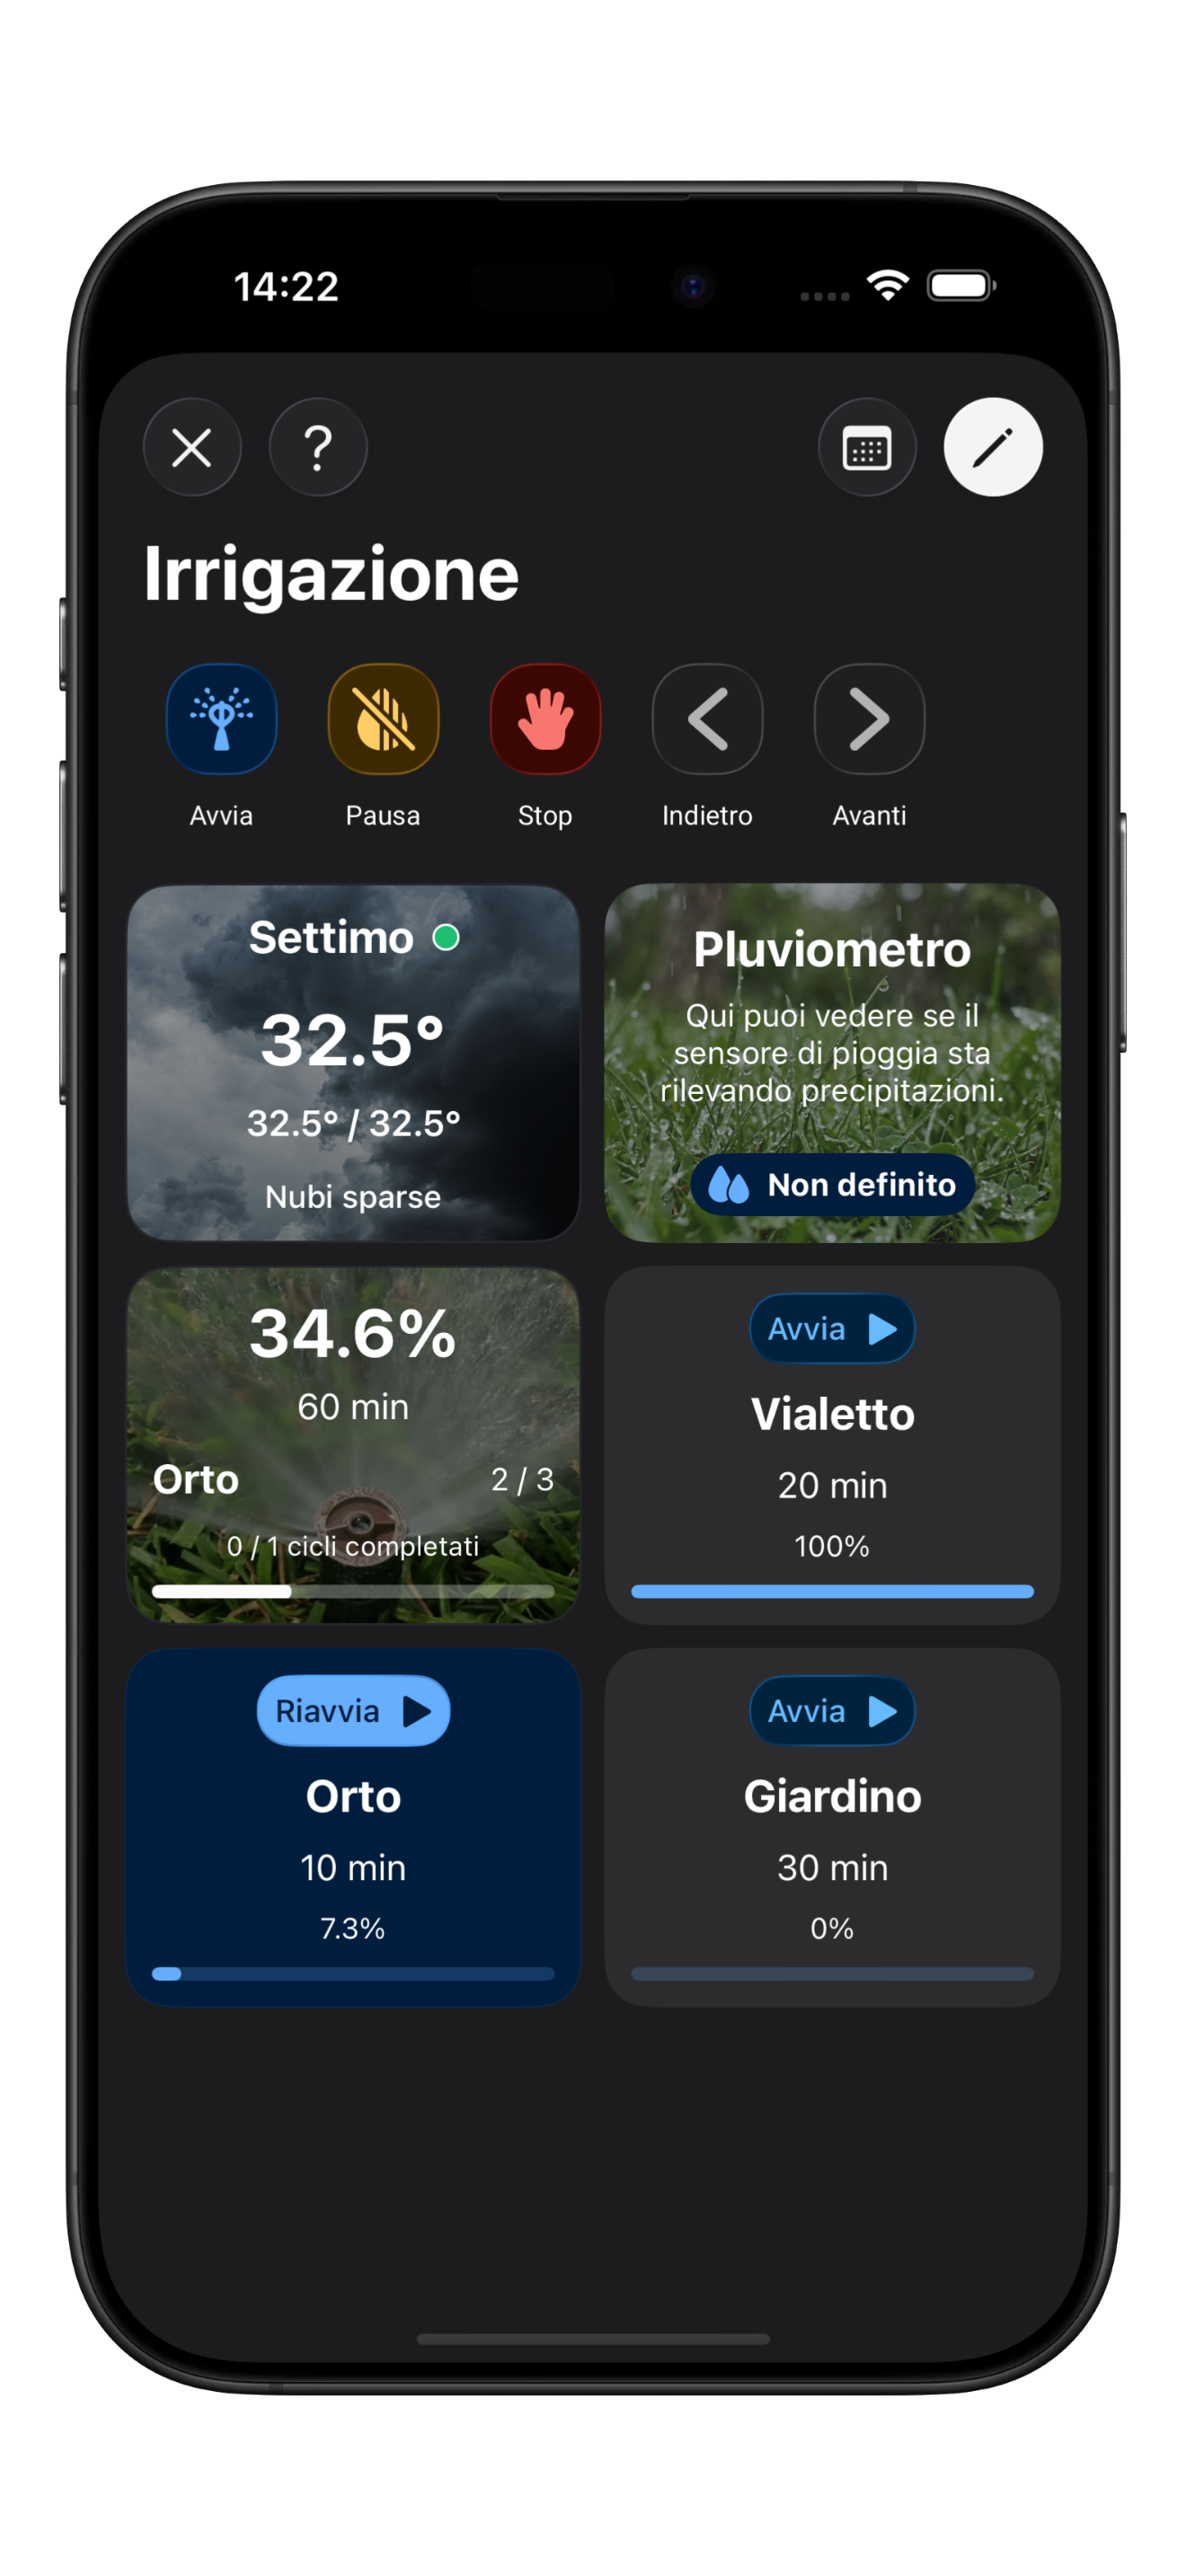
* **Irrigation Cycle Information:** here you will find a summary of what is happening; if the cycle is running, the completion percentage and which phase (zone) is currently being irrigated.
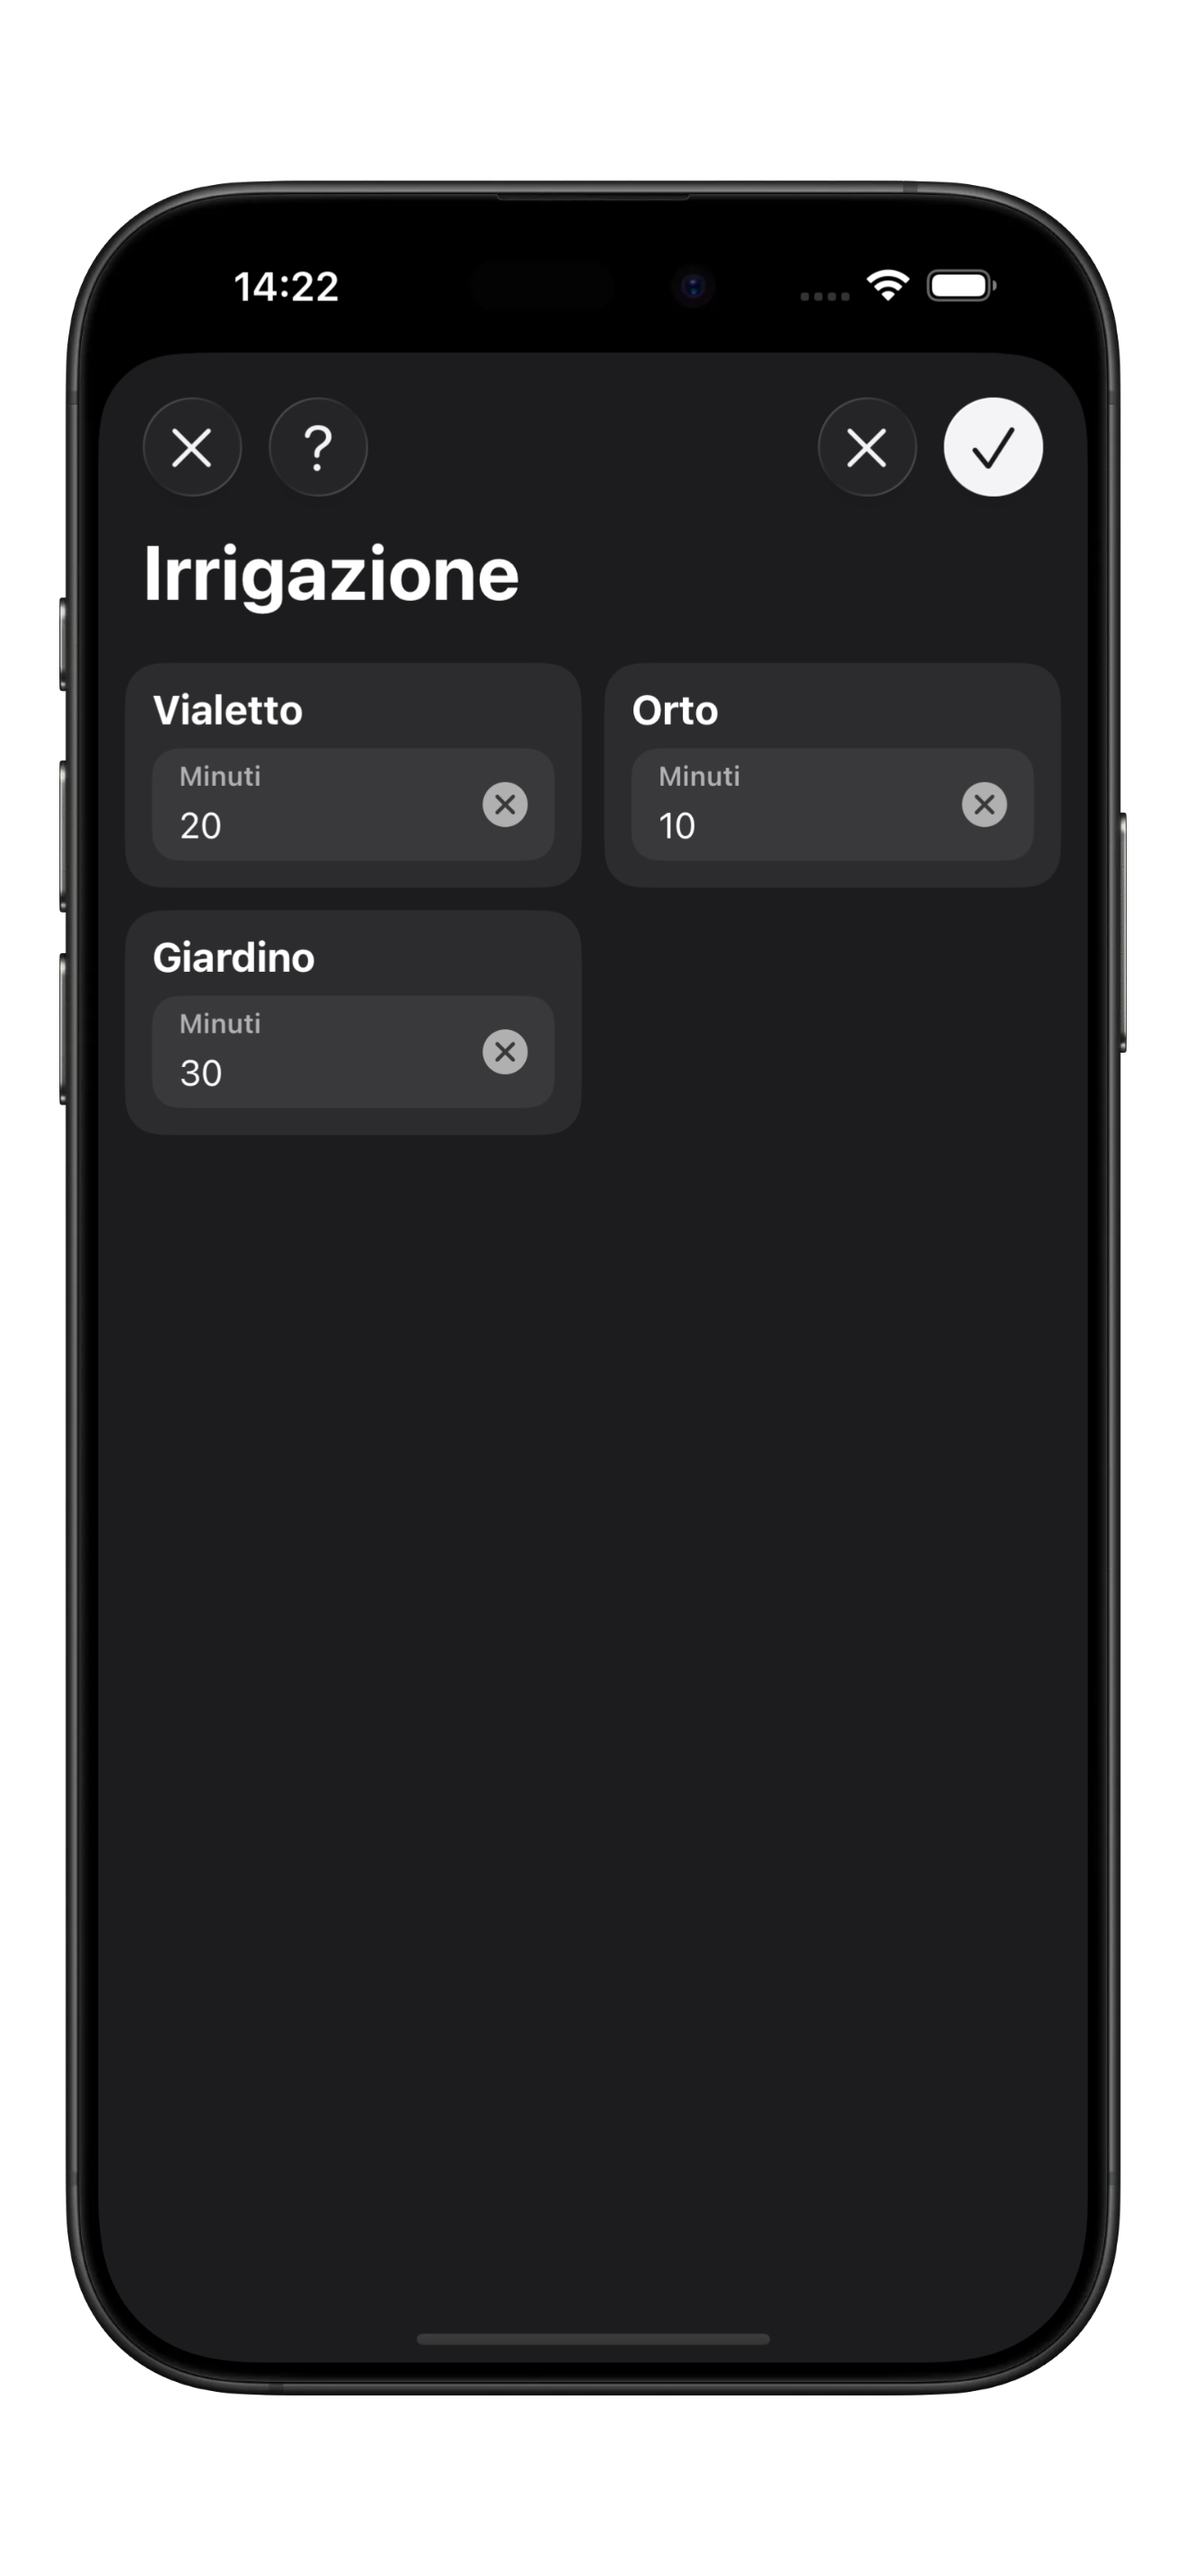
* **Zones / Phases:** below, you will find the configured zones/phases, and you can edit their duration, order, and name.
{% hint style="info" %}
You can link irrigation to weather conditions to automatically avoid starting the cycle if rain is forecast; contact your technician to activate this option.
Keep in mind that, since these are *forecasts*, they cannot provide the same reliability as a rain gauge.
{% endhint %}
## Zones / Phases
When we talk about *zones* or *phases*, we are essentially referring to the same thing. Each garden zone is associated with a specific phase of the irrigation cycle. Phases are what you can edit to manage the system.
The card representing the zone (or phase) includes:
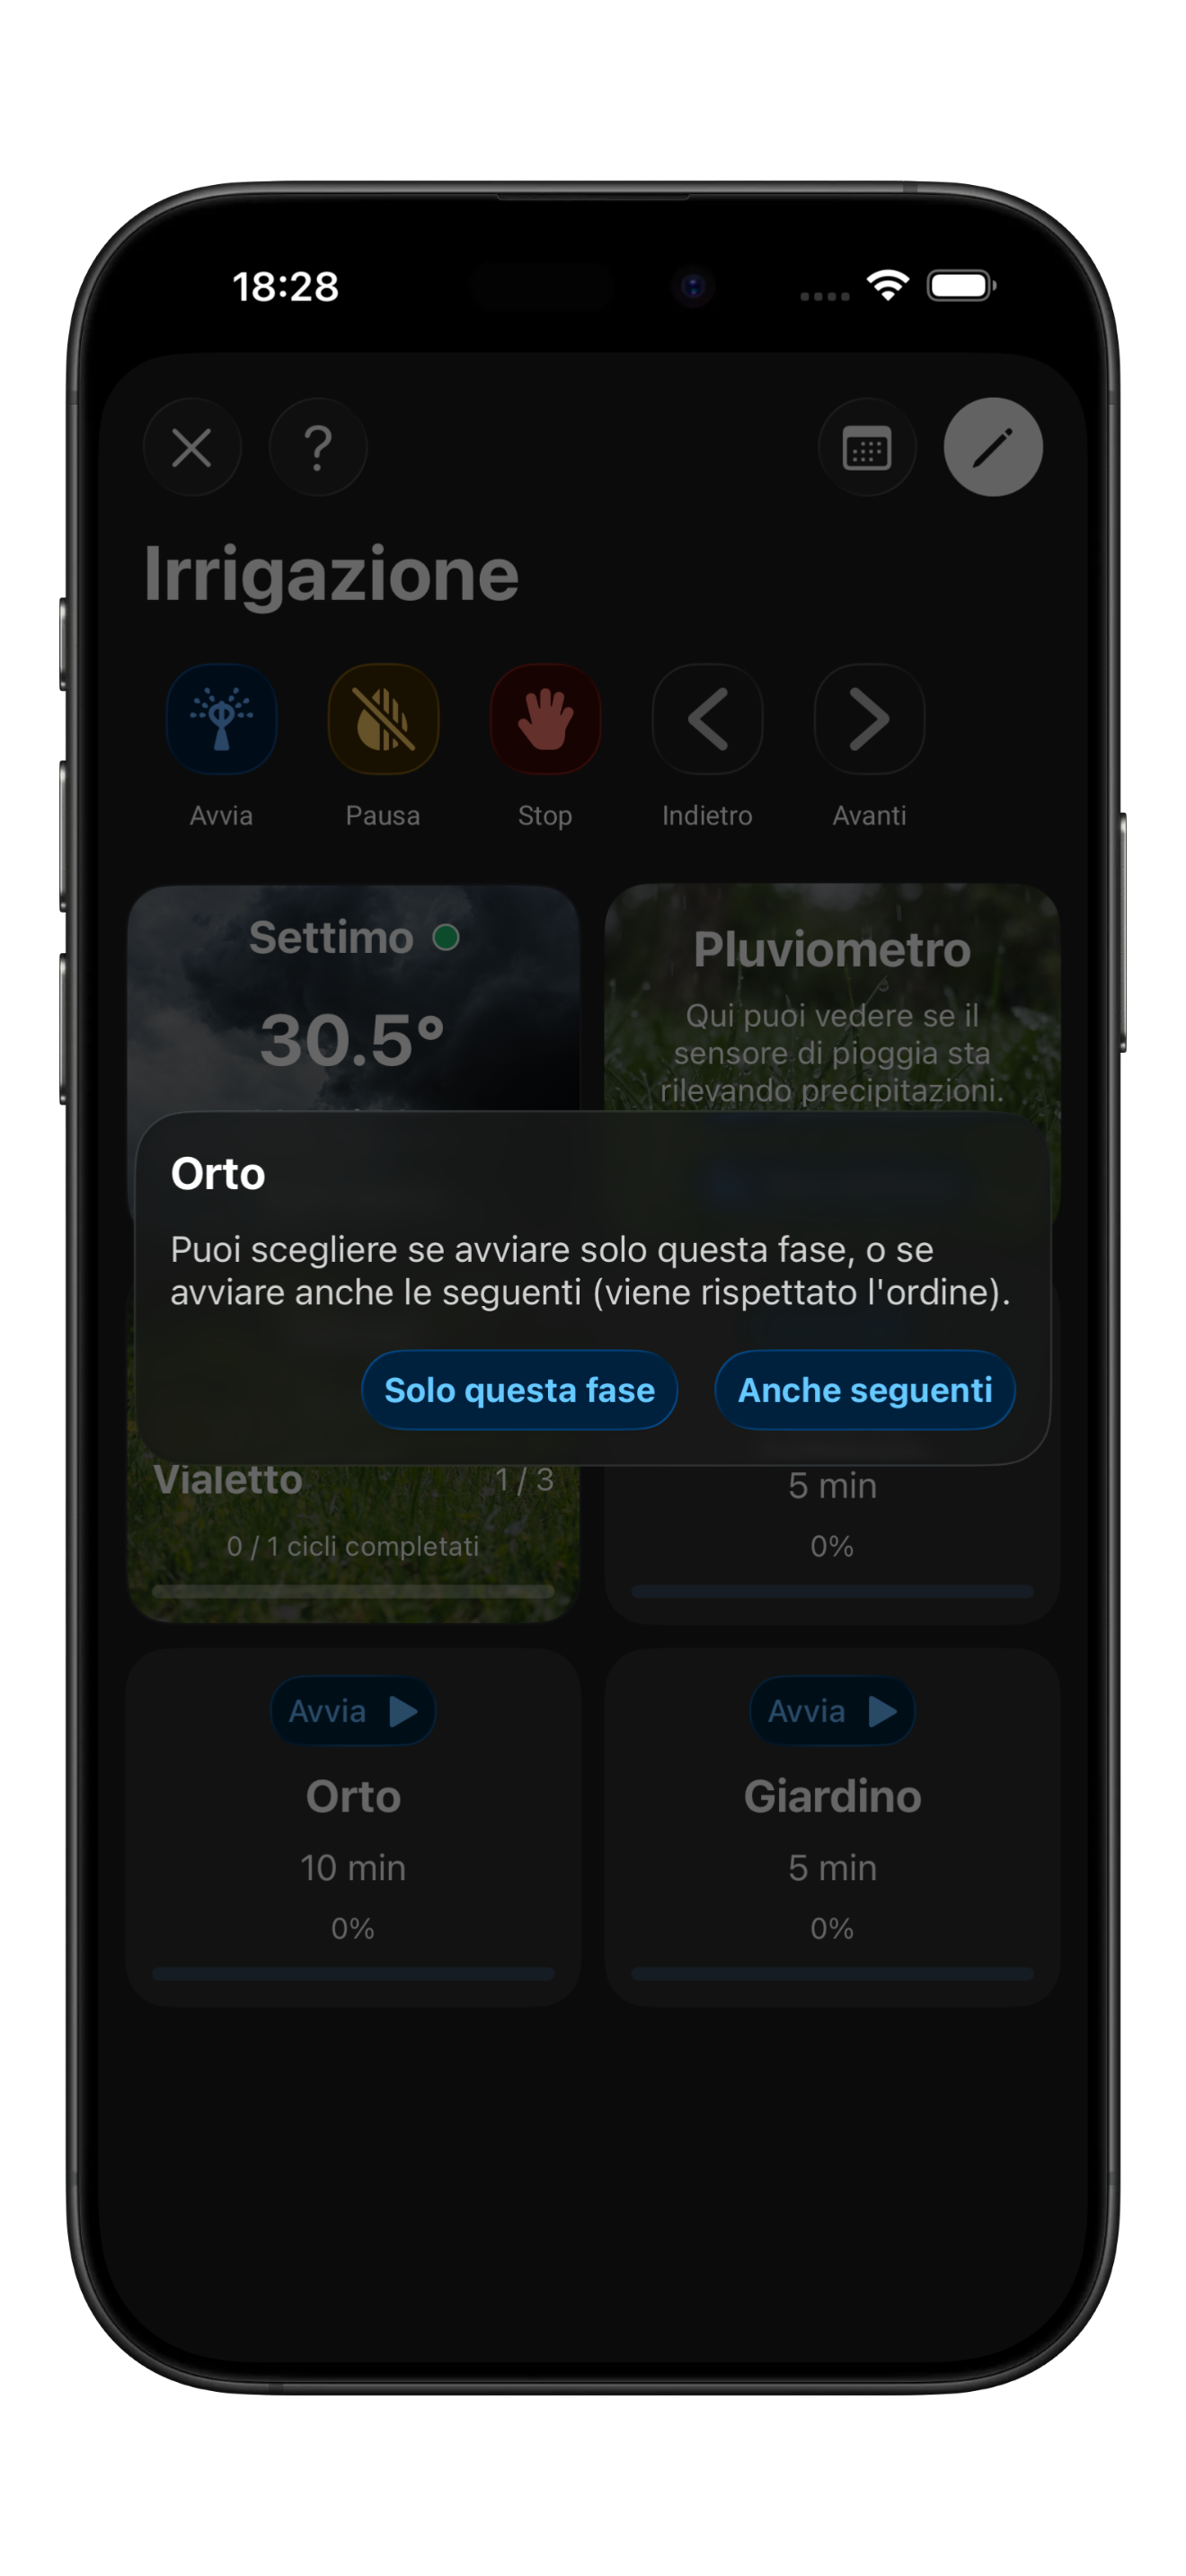
* **Start Button:** if you want to irrigate a specific zone, you can tap *Start* and choose whether to start only that phase or the following ones as well.
* **Name:** the name helps distinguish the different phases, and [you can edit it](#modifying-the-configuration) as needed.
* **Duration:** phase duration is shown in minutes, and you can change it by tapping directly on the value.
* **Completion Percentage:** the percentage value indicates the progress of the specific phase.
### Modifying the Configuration
To modify phase configuration, tap the pencil icon button in the top right corner.
You can perform the following actions:
* **Reorder Phases:** to reorder phases, press and hold the phase you want to move, then drag it where you want.
* **Edit Name:** tap directly on the text.
* **Edit Duration:** tap directly on the value.
Once you complete your changes, tap the Save button `✓`; to discard them, tap the Cancel button `X`.
## Calendar
The ideal setup is to schedule automatic execution of the irrigation cycle, while *manual* start or stop should be used only in specific cases.
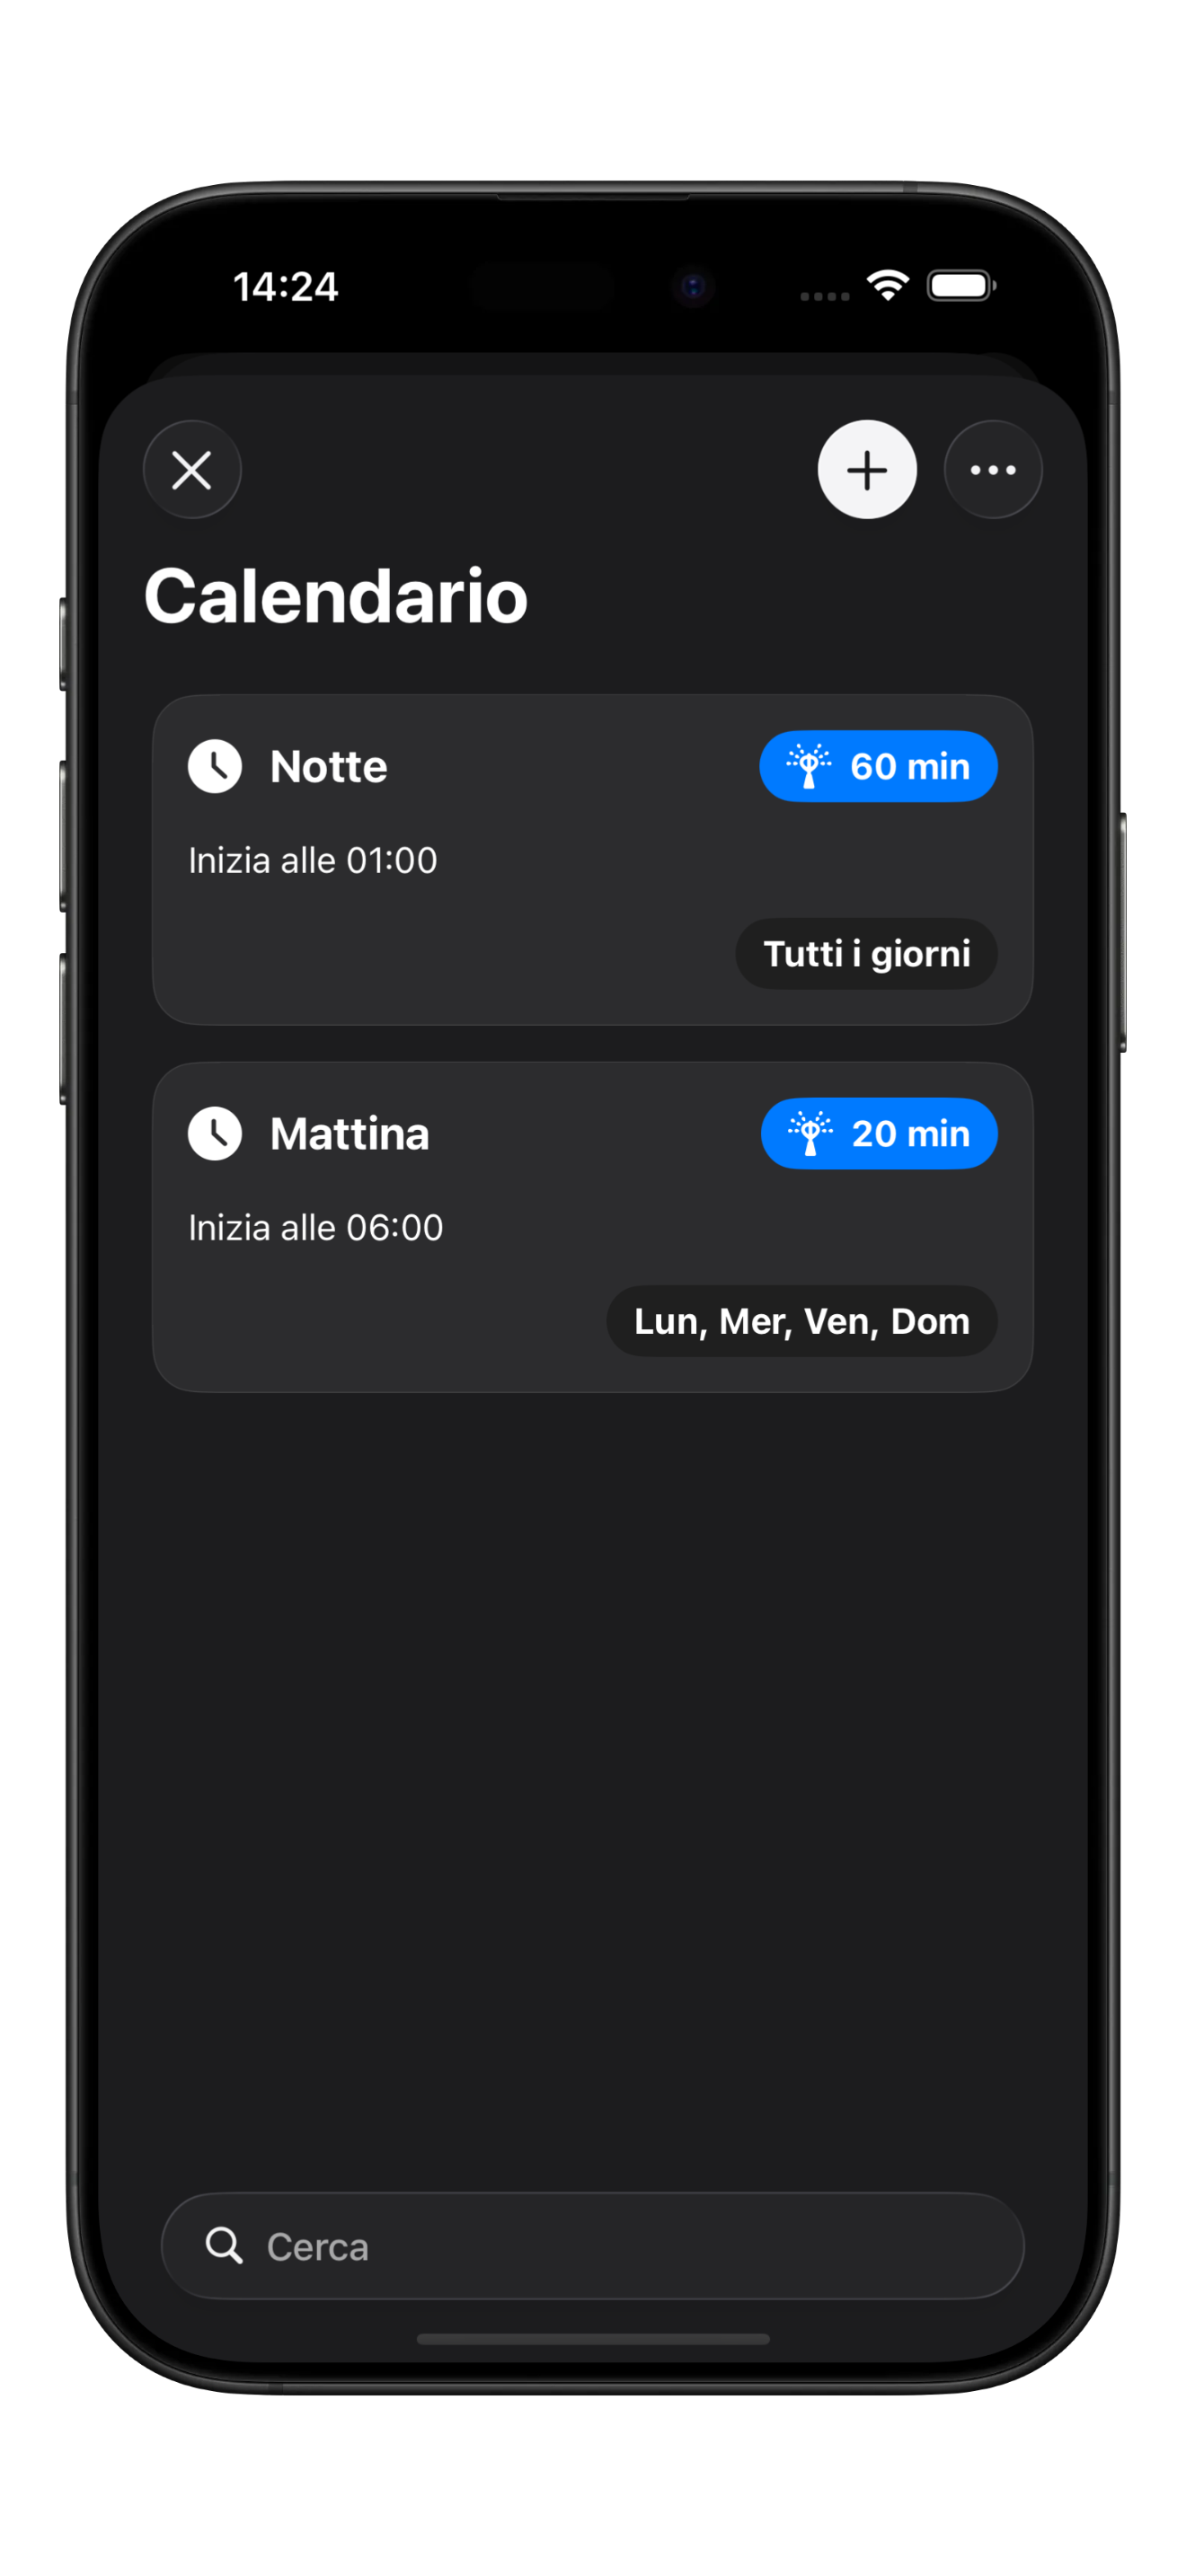
To configure scheduling, tap the *Calendar* button in the top right corner.
Once the calendar page is open, tap the three dots in the top right corner to:
* **Activate All:** tap this button to enable all configured events.
* **Deactivate All:** tap this button to disable all configured events.
To add a new event, tap the `+` button in the top right corner.
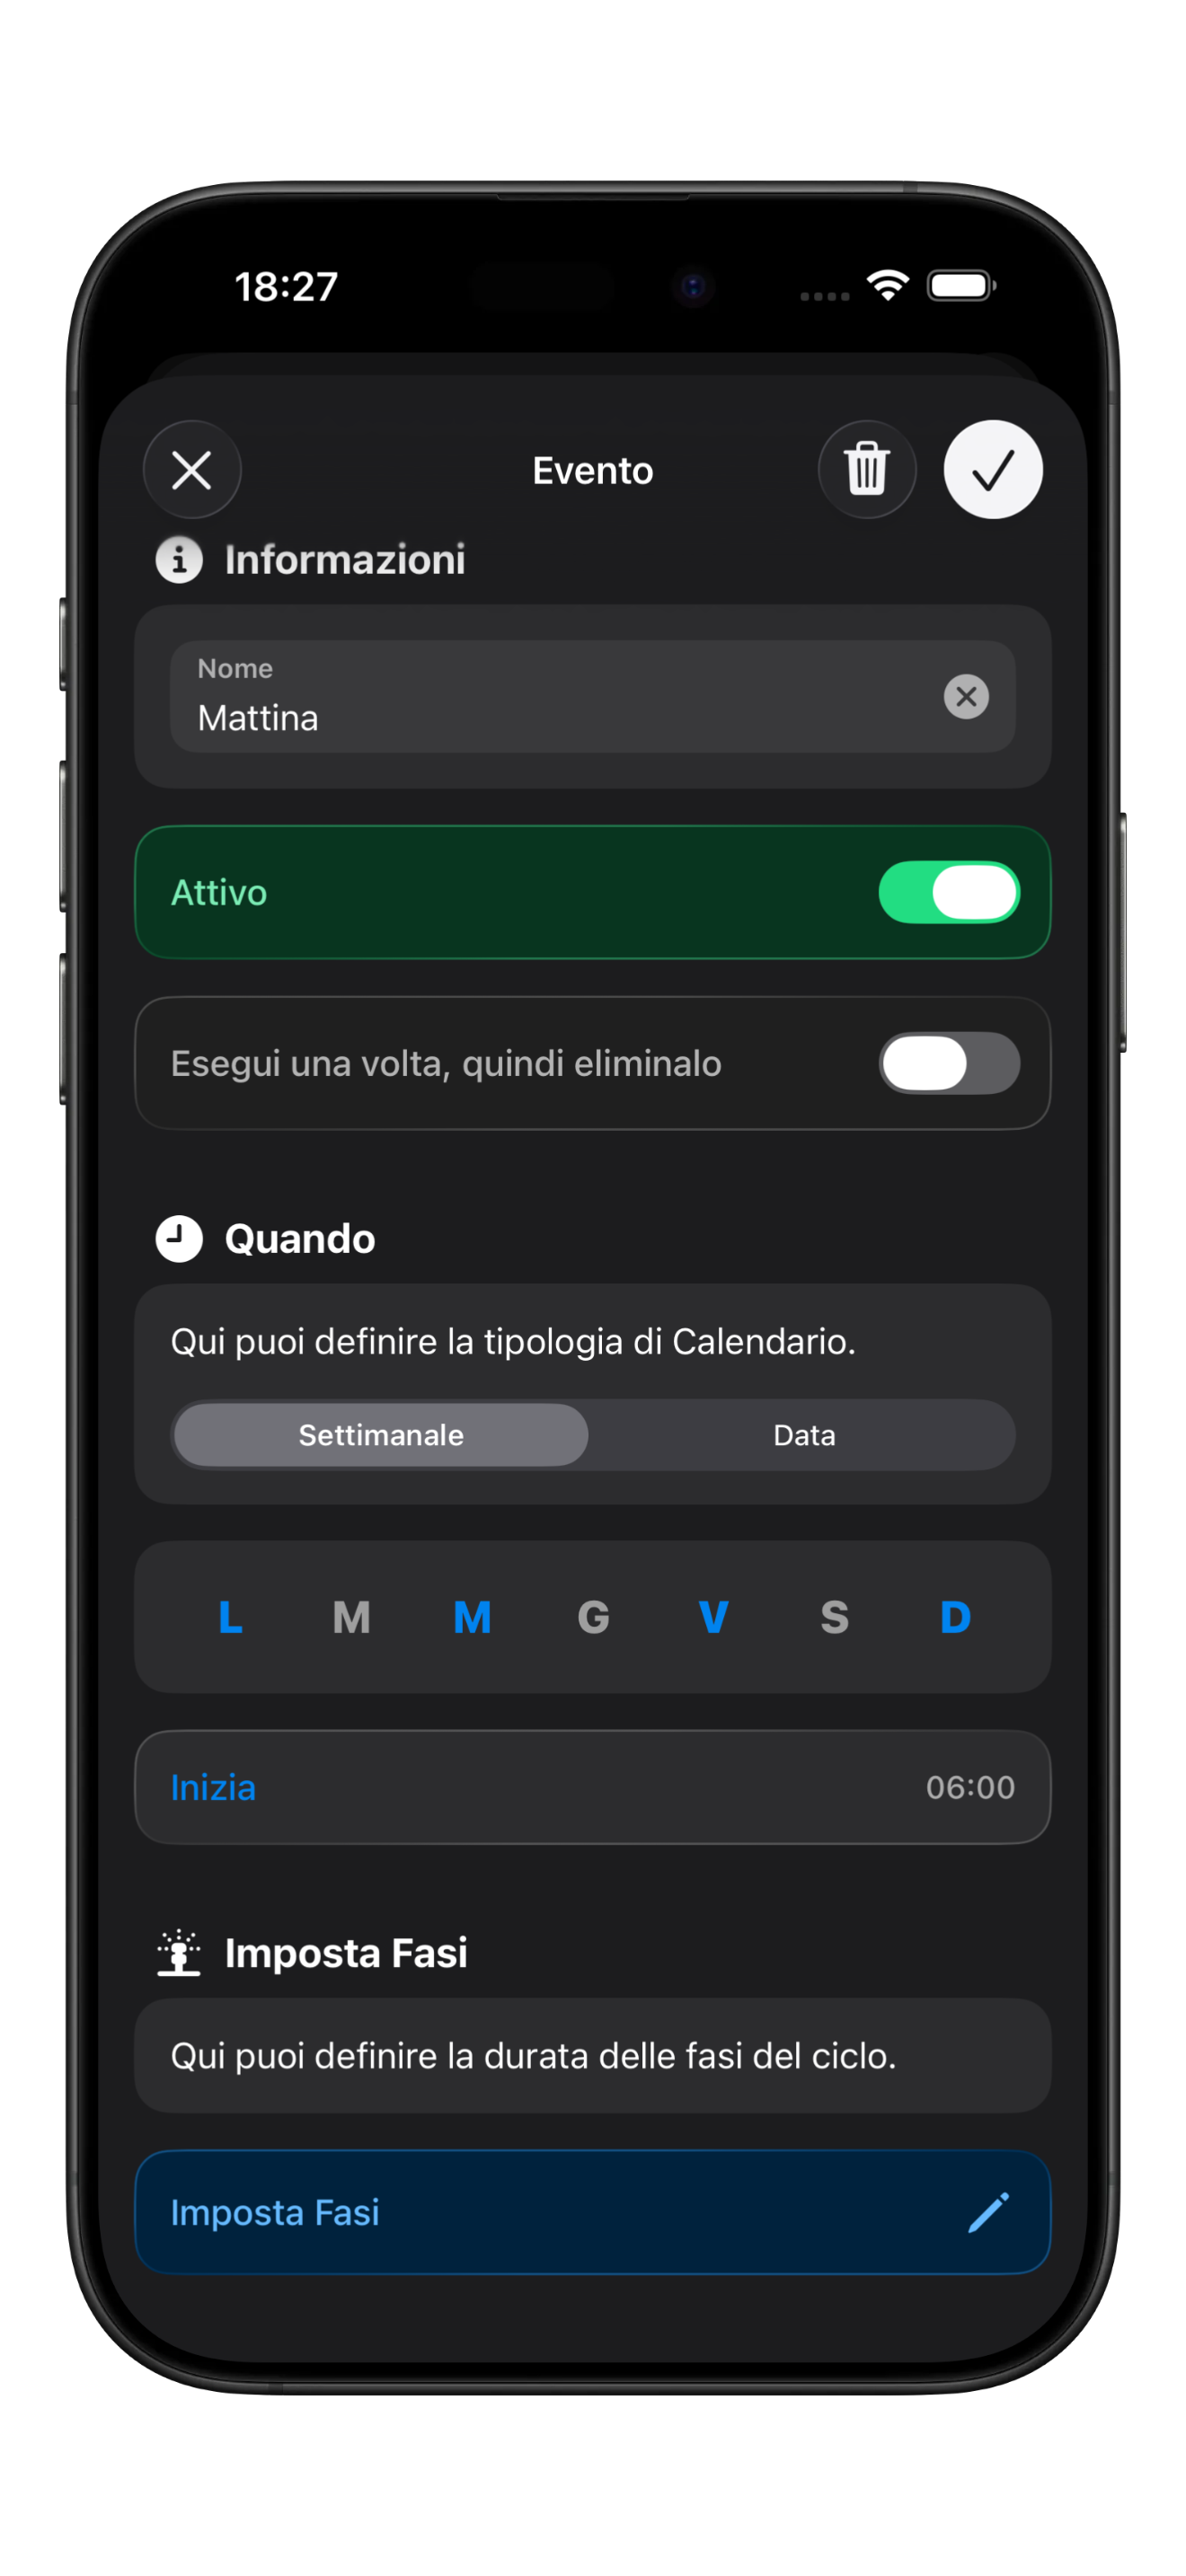
### Event Creation
Creating an event is quite simple and allows you to set a name for the event (e.g. *Morning*), define the cycle start time, and choose the days of the week when it will run.
{% hint style="info" %}
If you want to irrigate more than once per day, you need to create an equivalent number of events.
{% endhint %}
{% hint style="info" %}
To edit an existing event, just tap on it.
{% endhint %}