> For the complete documentation index, see [llms.txt](https://docs.ohmautomation.io/llms.txt). Markdown versions of documentation pages are available by appending `.md` to page URLs; this page is available as [Markdown](https://docs.ohmautomation.io/en/android/guide/irrigation.md).
# Irrigation
The main functions for taking care of your garden, wherever you are.
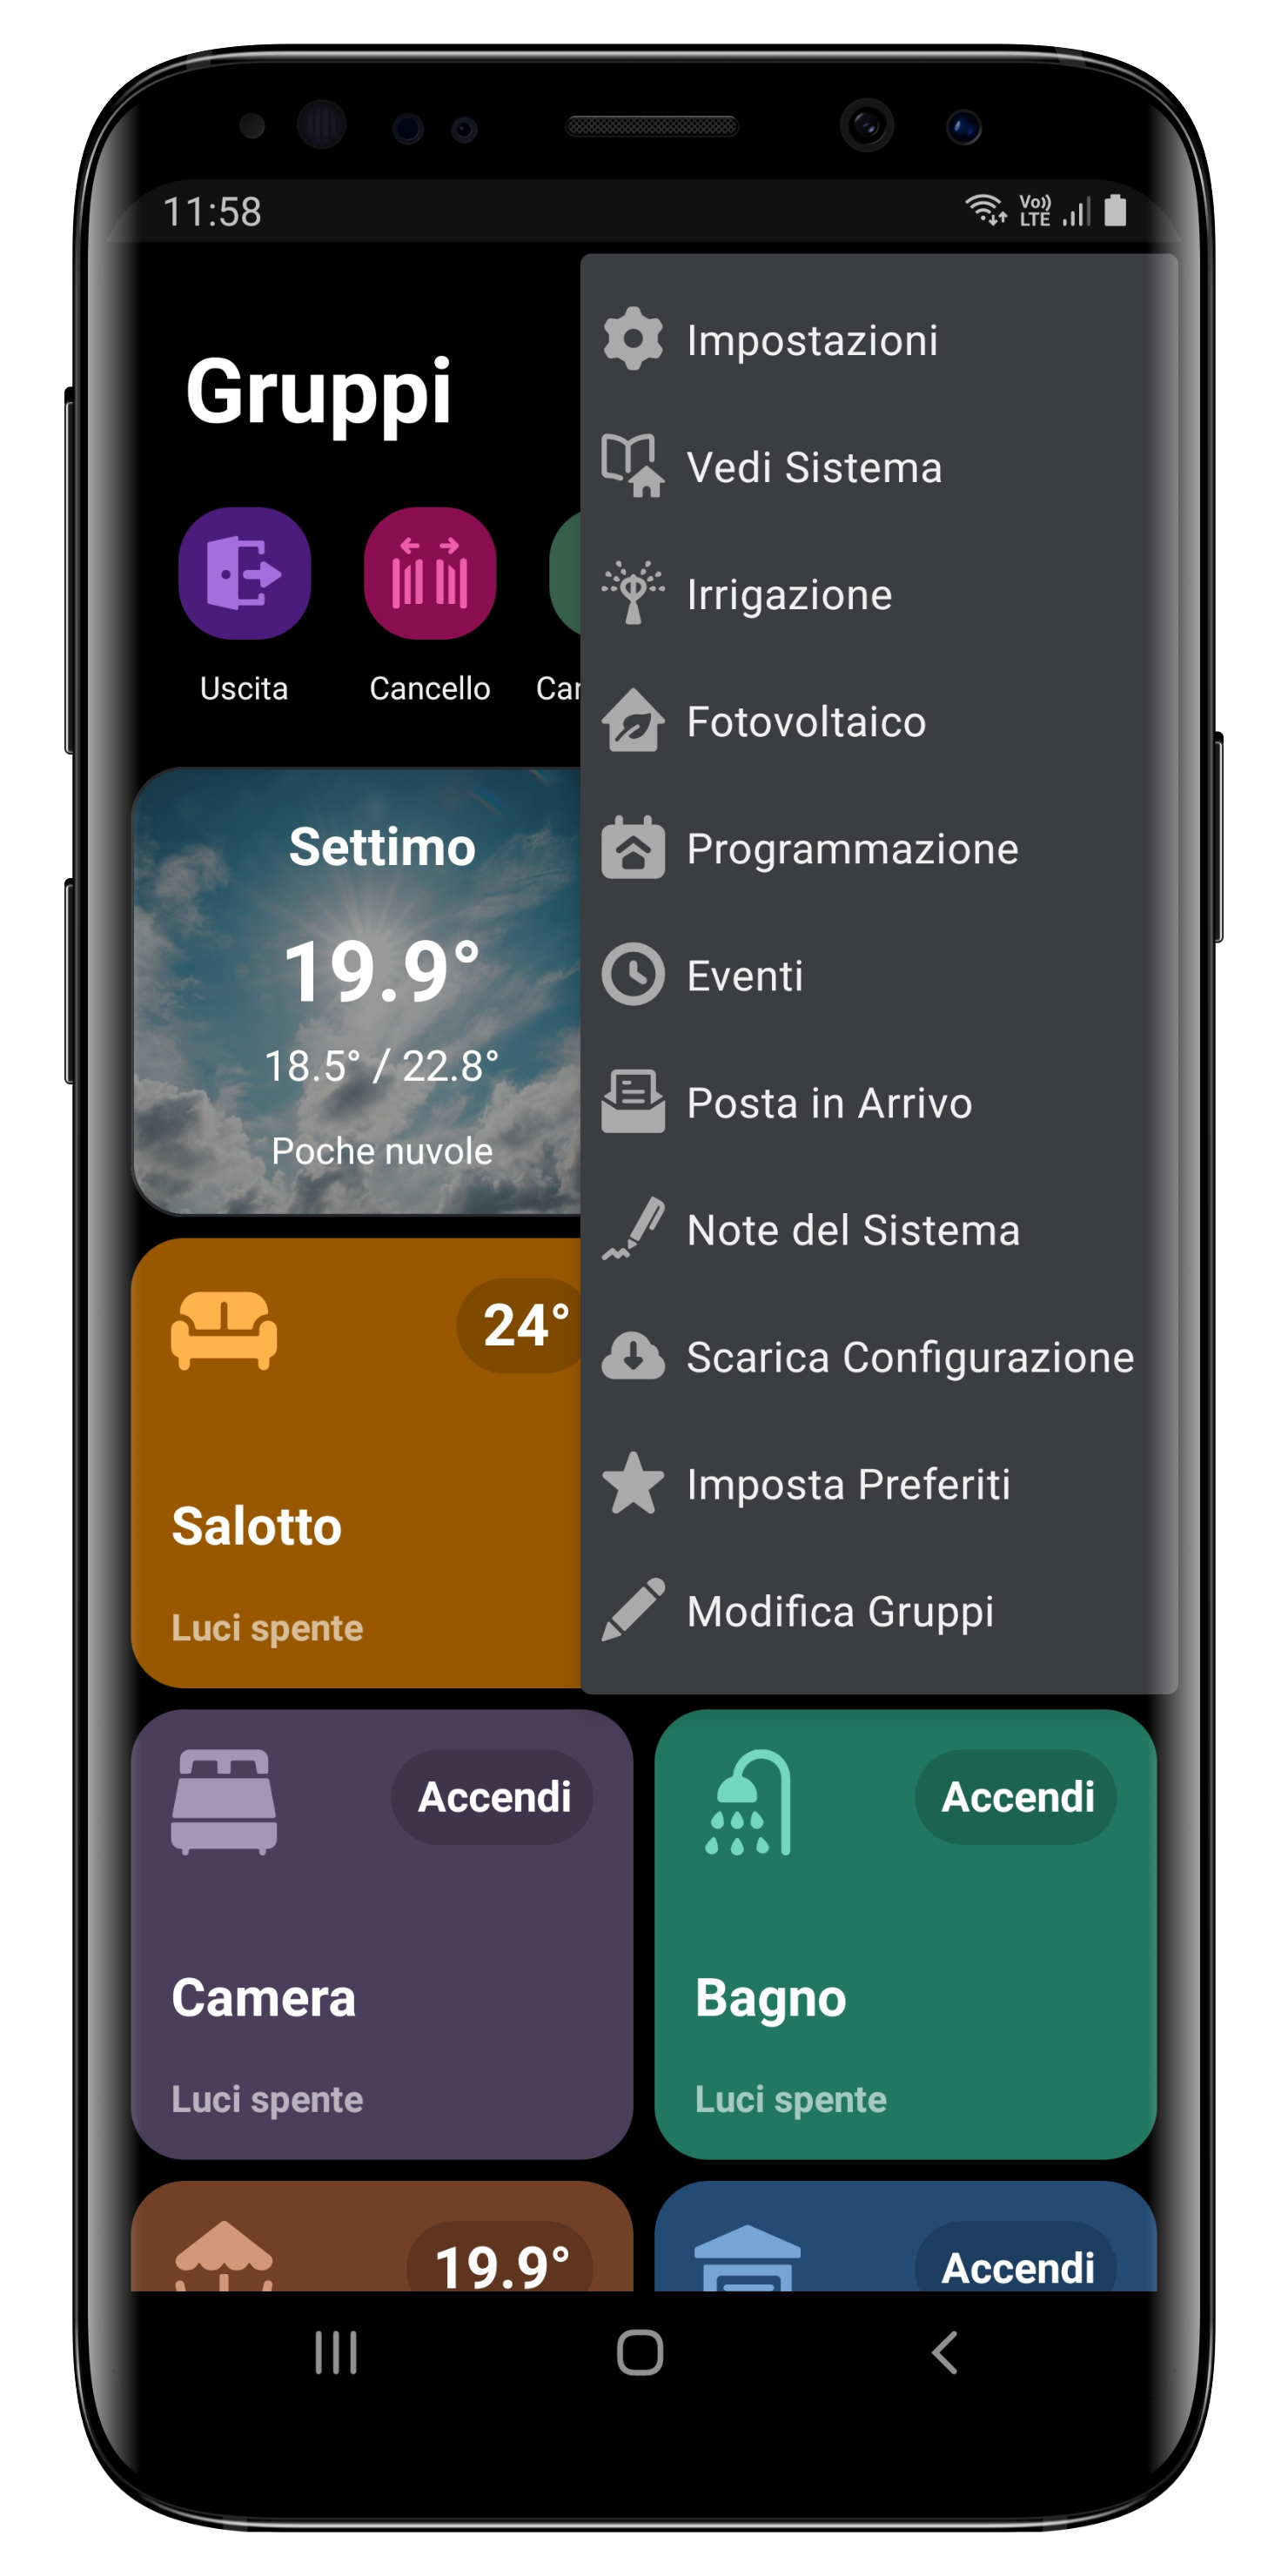
To access the Irrigation System, simply press the three dots at the top right, then the *Irrigation* button.
## The Basics
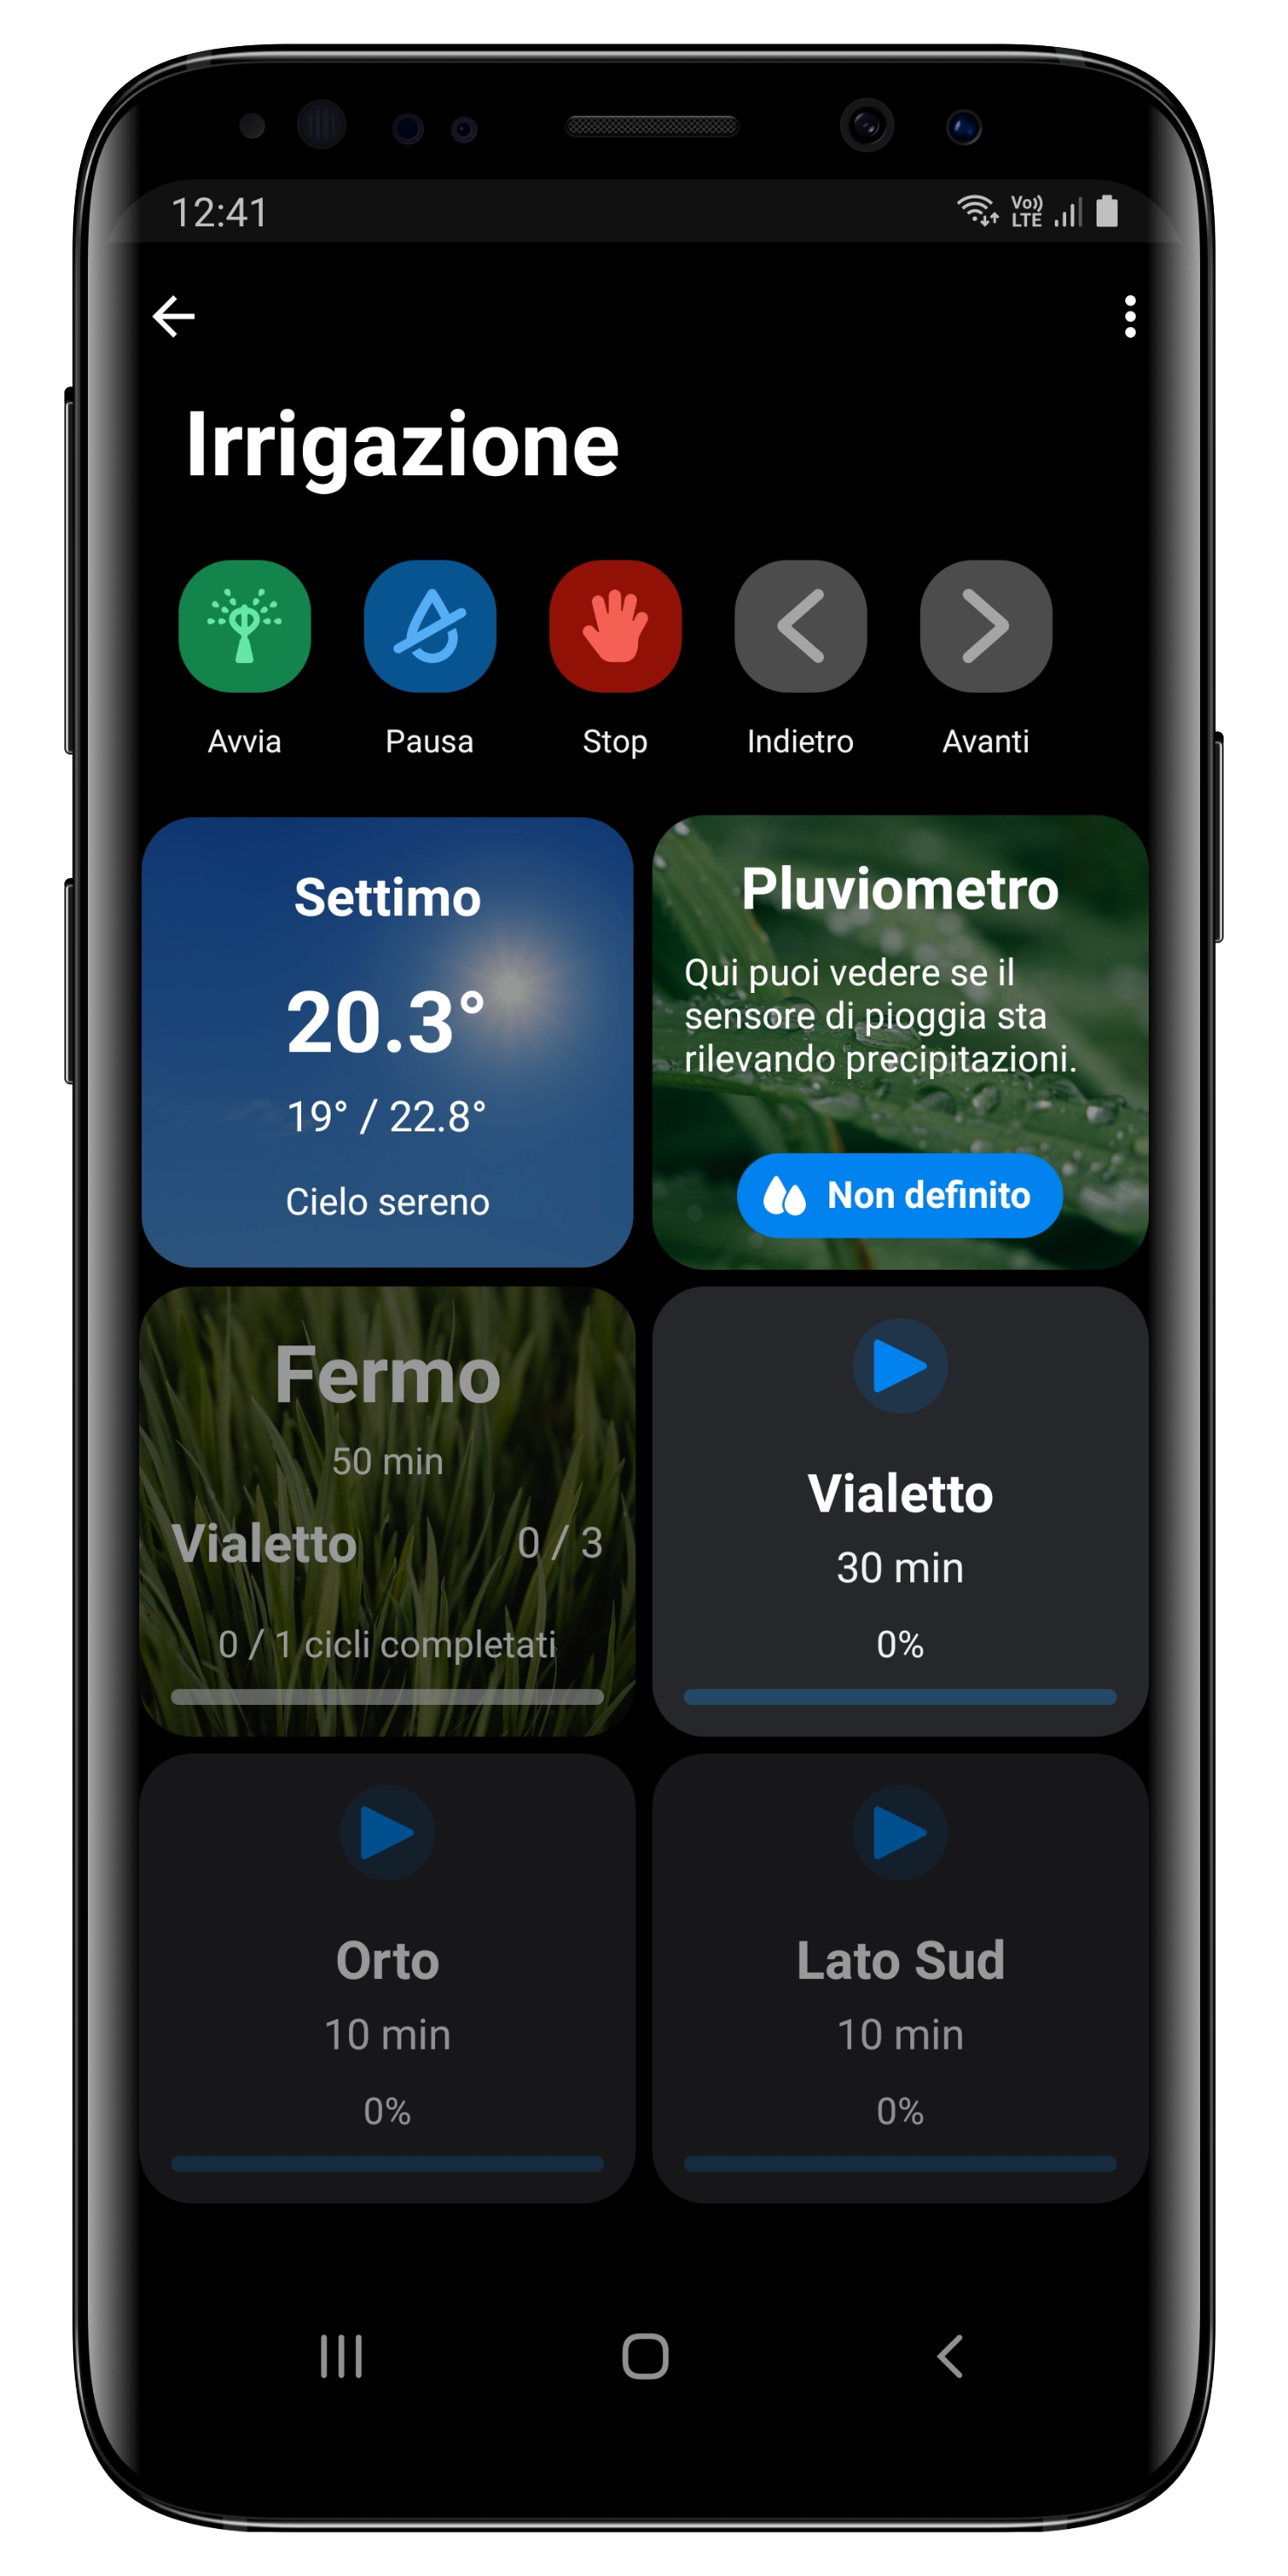
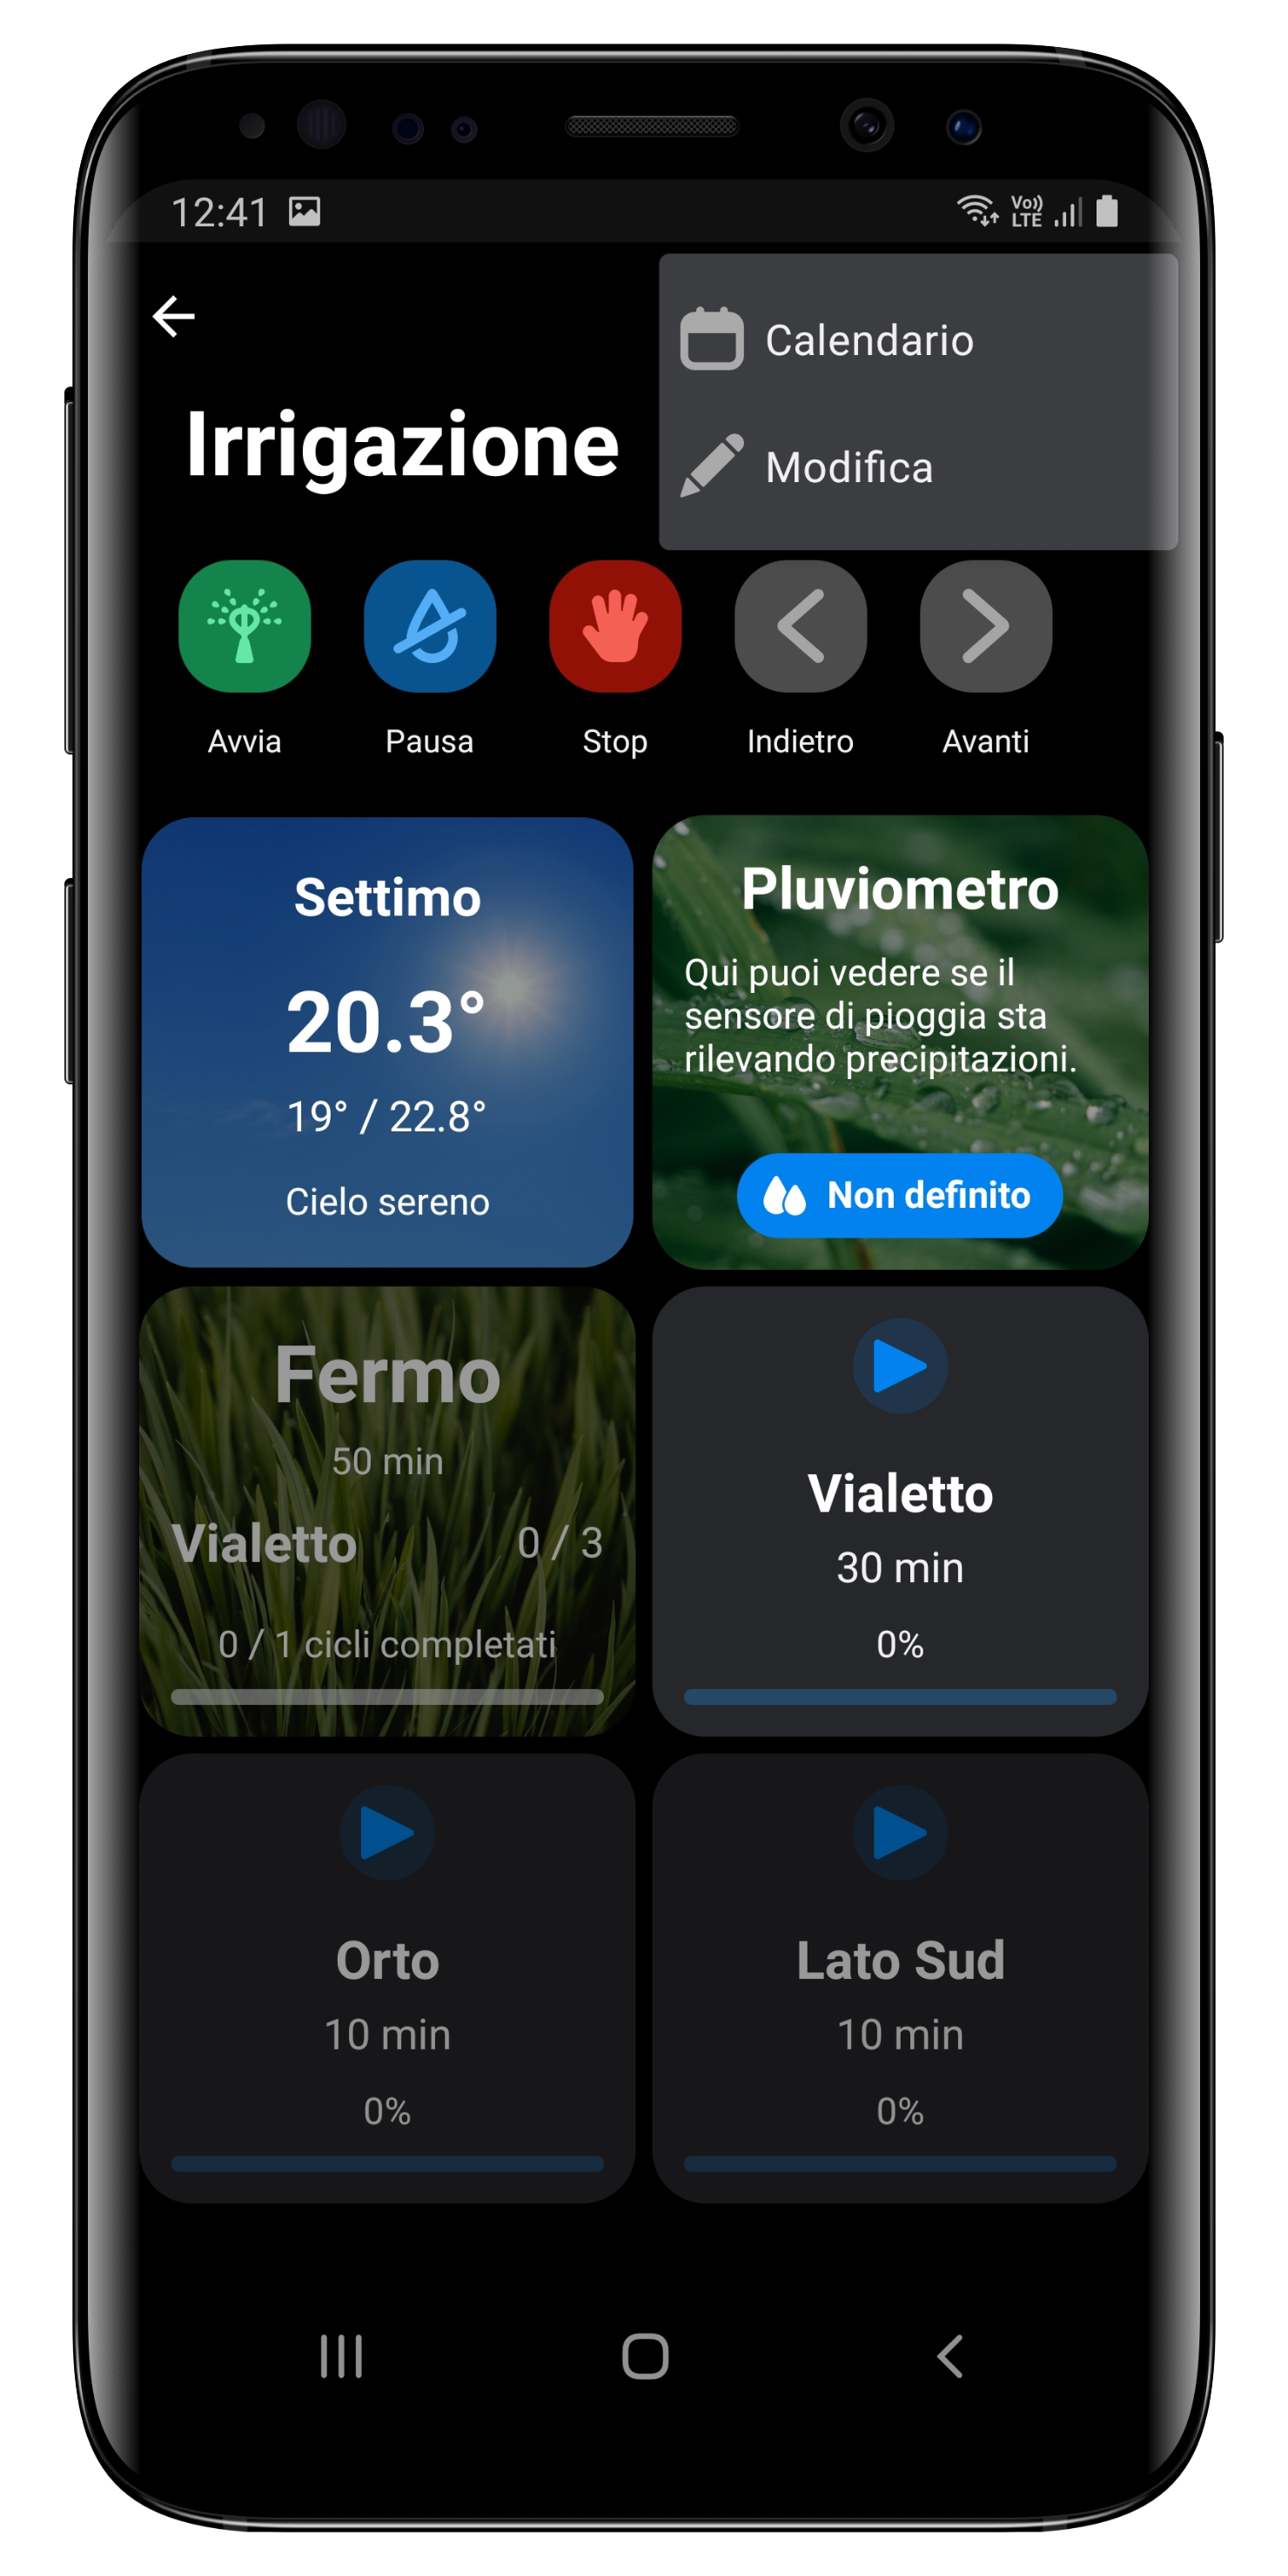
Managing irrigation is a bit like listening to music, the main controls are as follows:
* **Start:** press the green button with the sprinkler symbol to start the irrigation cycle.
* **Pause:** Did you forget to move something off the lawn? Temporarily pause the cycle by pressing the blue button. Pressing the *Start* button again will resume the cycle from where it was paused.
* **Stop:** using the red button, you can completely stop the cycle. By pressing the *Start* button again, the cycle will restart from the beginning.
* **Back / Forward:** these two buttons allow you to go back to the previous stage or move to the next one.
{% hint style="info" %}
We talked about the *irrigation cycle*, as it's essential to divide the garden into zones to ensure adequate system pressure, thus ensuring a correct water supply. Each zone corresponds to a specific phase of the cycle.
{% endhint %}
In addition to the main buttons, these are the elements you will find on the page:
* **Weather Forecasts:** useful if you're away from home to avoid watering when it rains.
* **Rain Gauge:** If you have installed a rain sensor, you can check the condition of your lawn; the system will automatically avoid initiating the irrigation cycle if the garden is sufficiently moist.
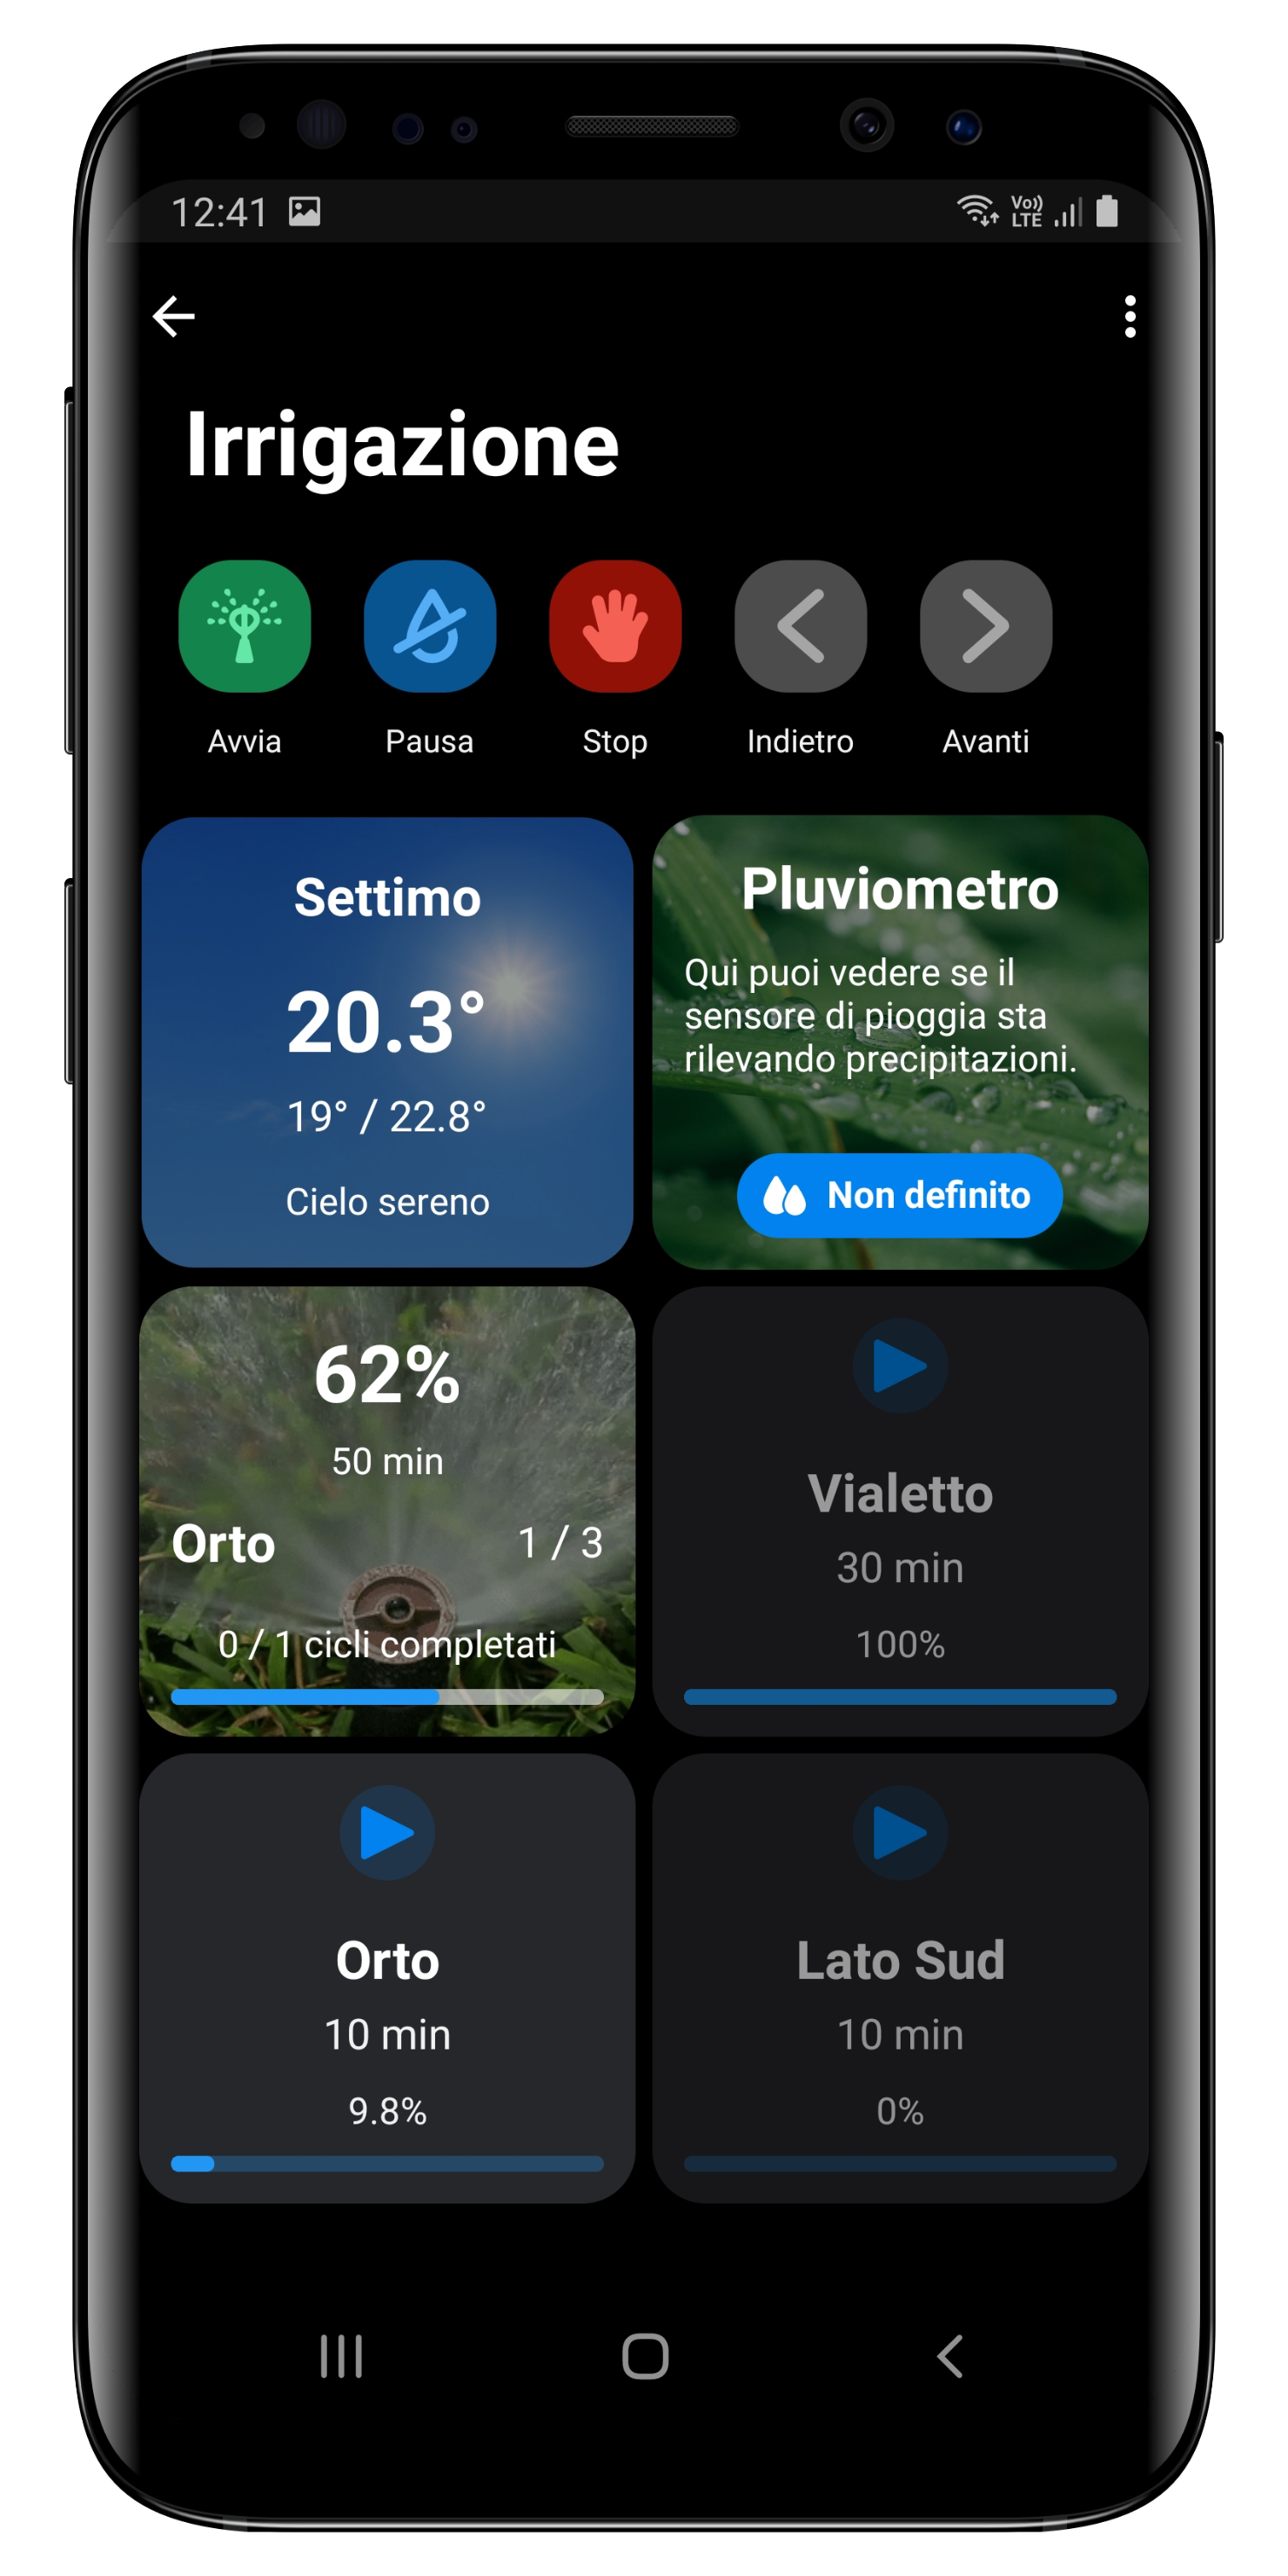
* **Irrigation Cycle Information:** here you can find a summary of what is happening; if the cycle is in progress, the percentage of completion, and which phase (zone) is being irrigated at that moment.
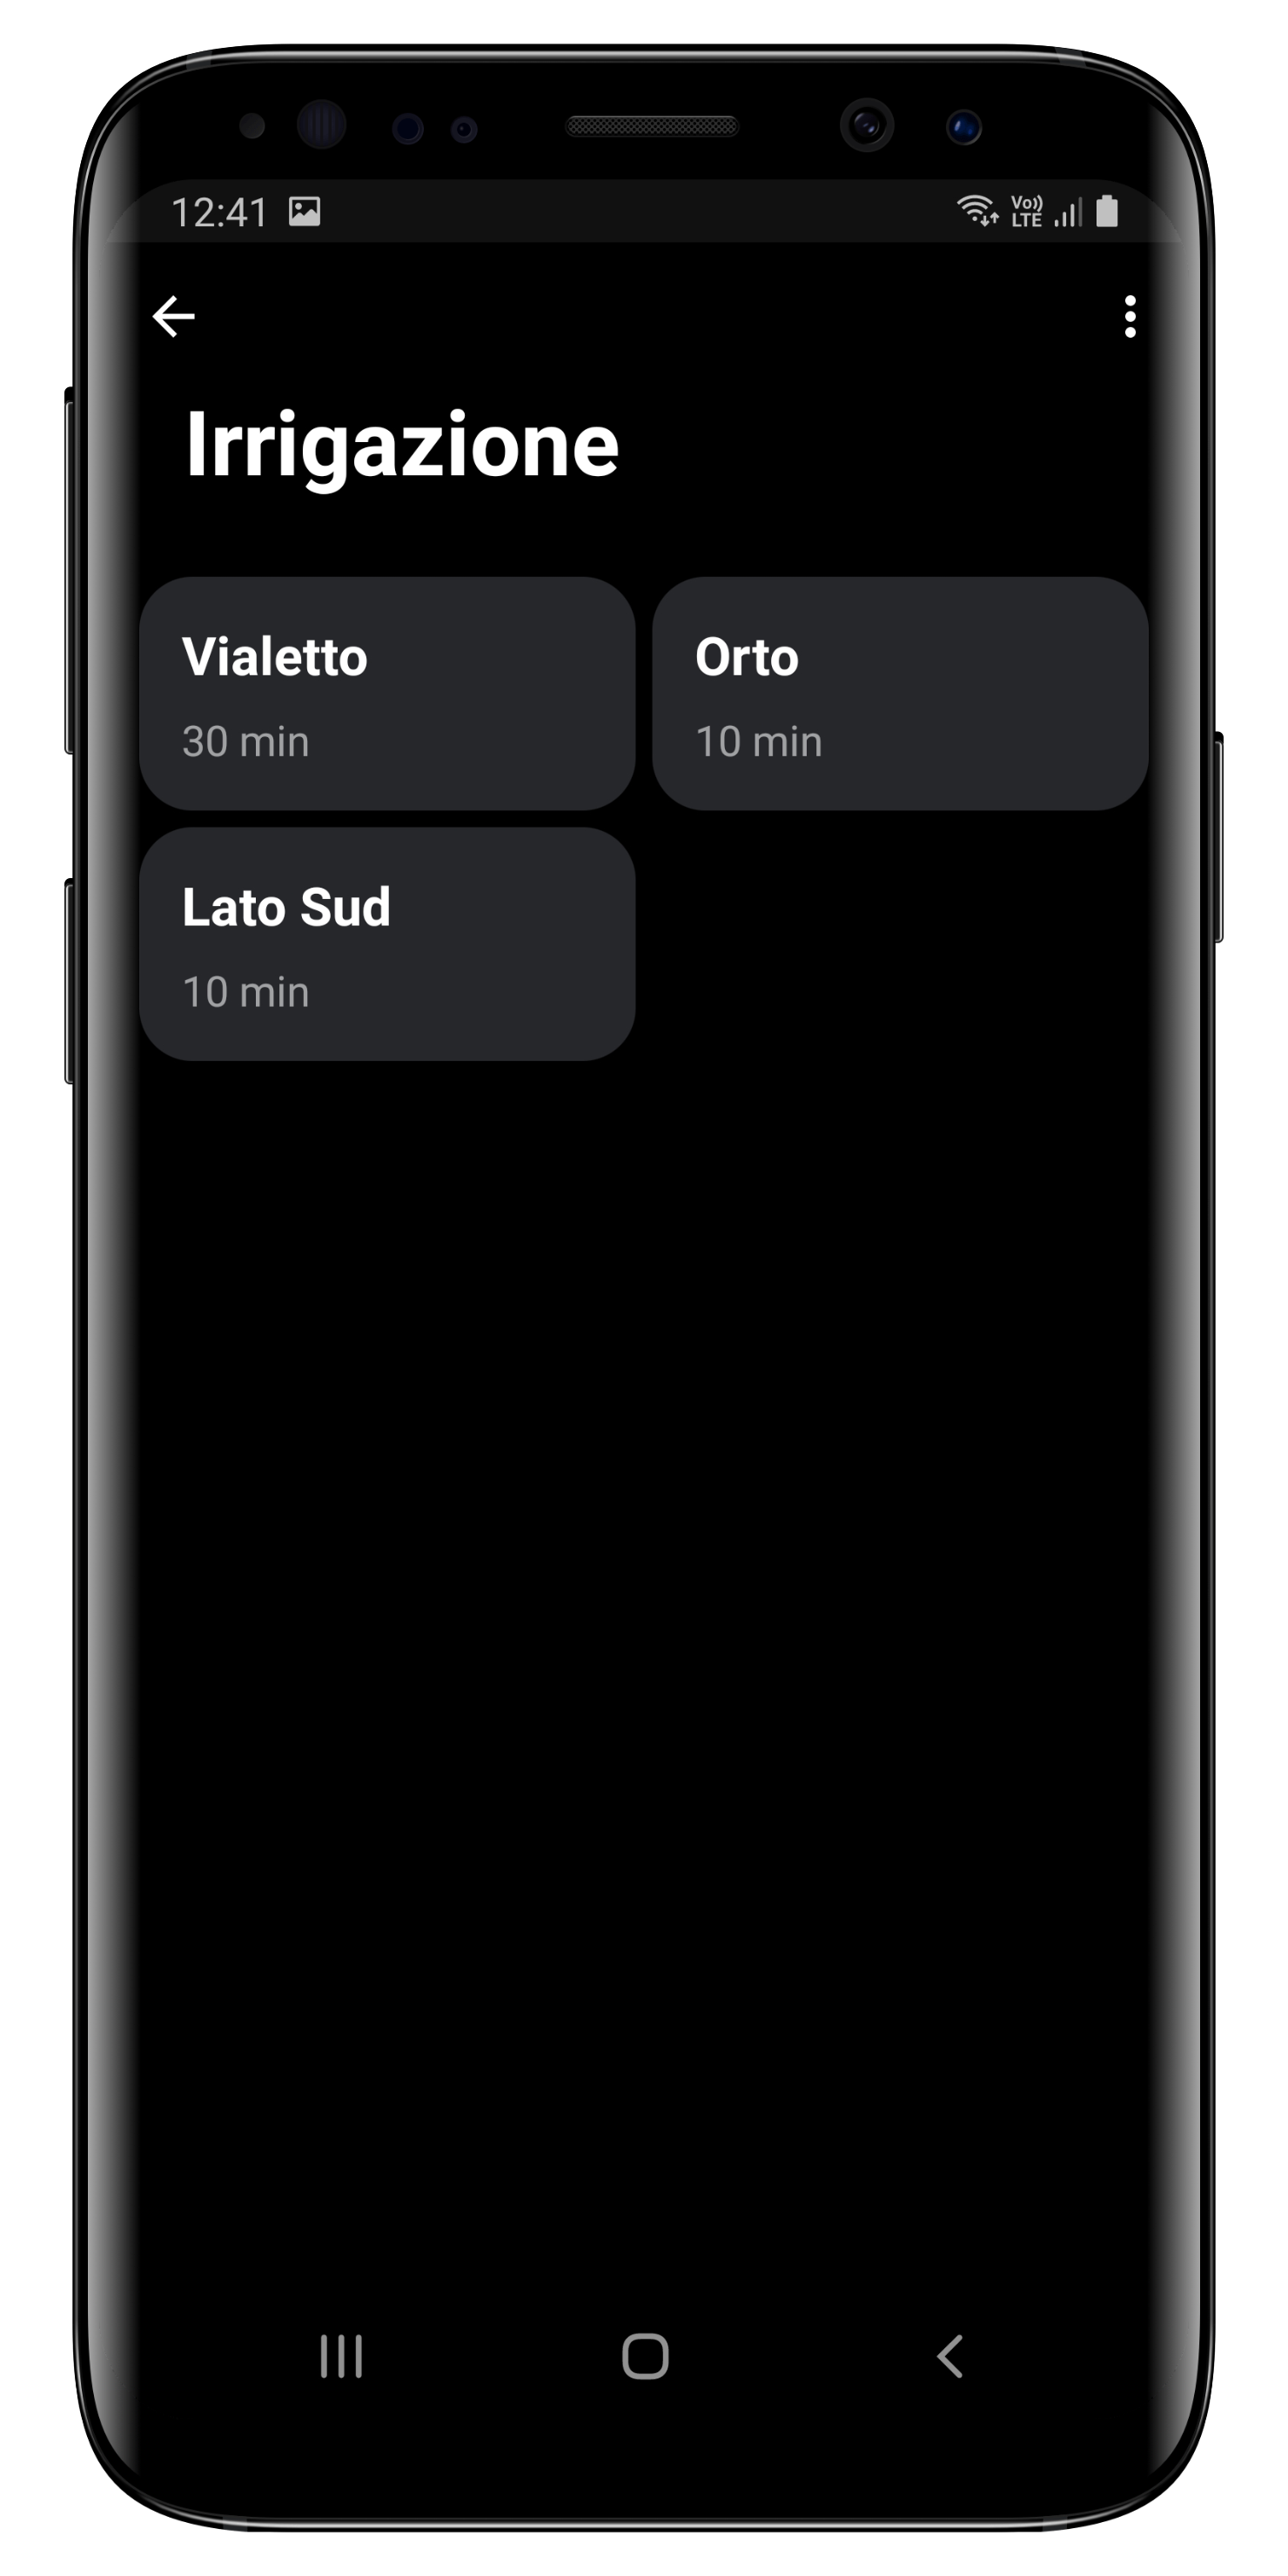
* **Zones / Phases:** Below are the zones/phases that have been configured, which you can modify in terms of time, order, and name.
{% hint style="info" %}
Remember that since these are *predictions*, it is not possible to achieve the same performance as a rain gauge.
It is possible to link irrigation to weather conditions, so as to automatically avoid starting the cycle if rain is forecast; contact your technician to activate this option.
{% endhint %}
## Zones / Phases
When we talk about *zones* or *phases*, we essentially mean the same thing. Each zone of the garden is associated with a specific phase in the irrigation cycle. You can intervene in the phases to manage the system.
The cell representing the zone (or phase) is characterized by:
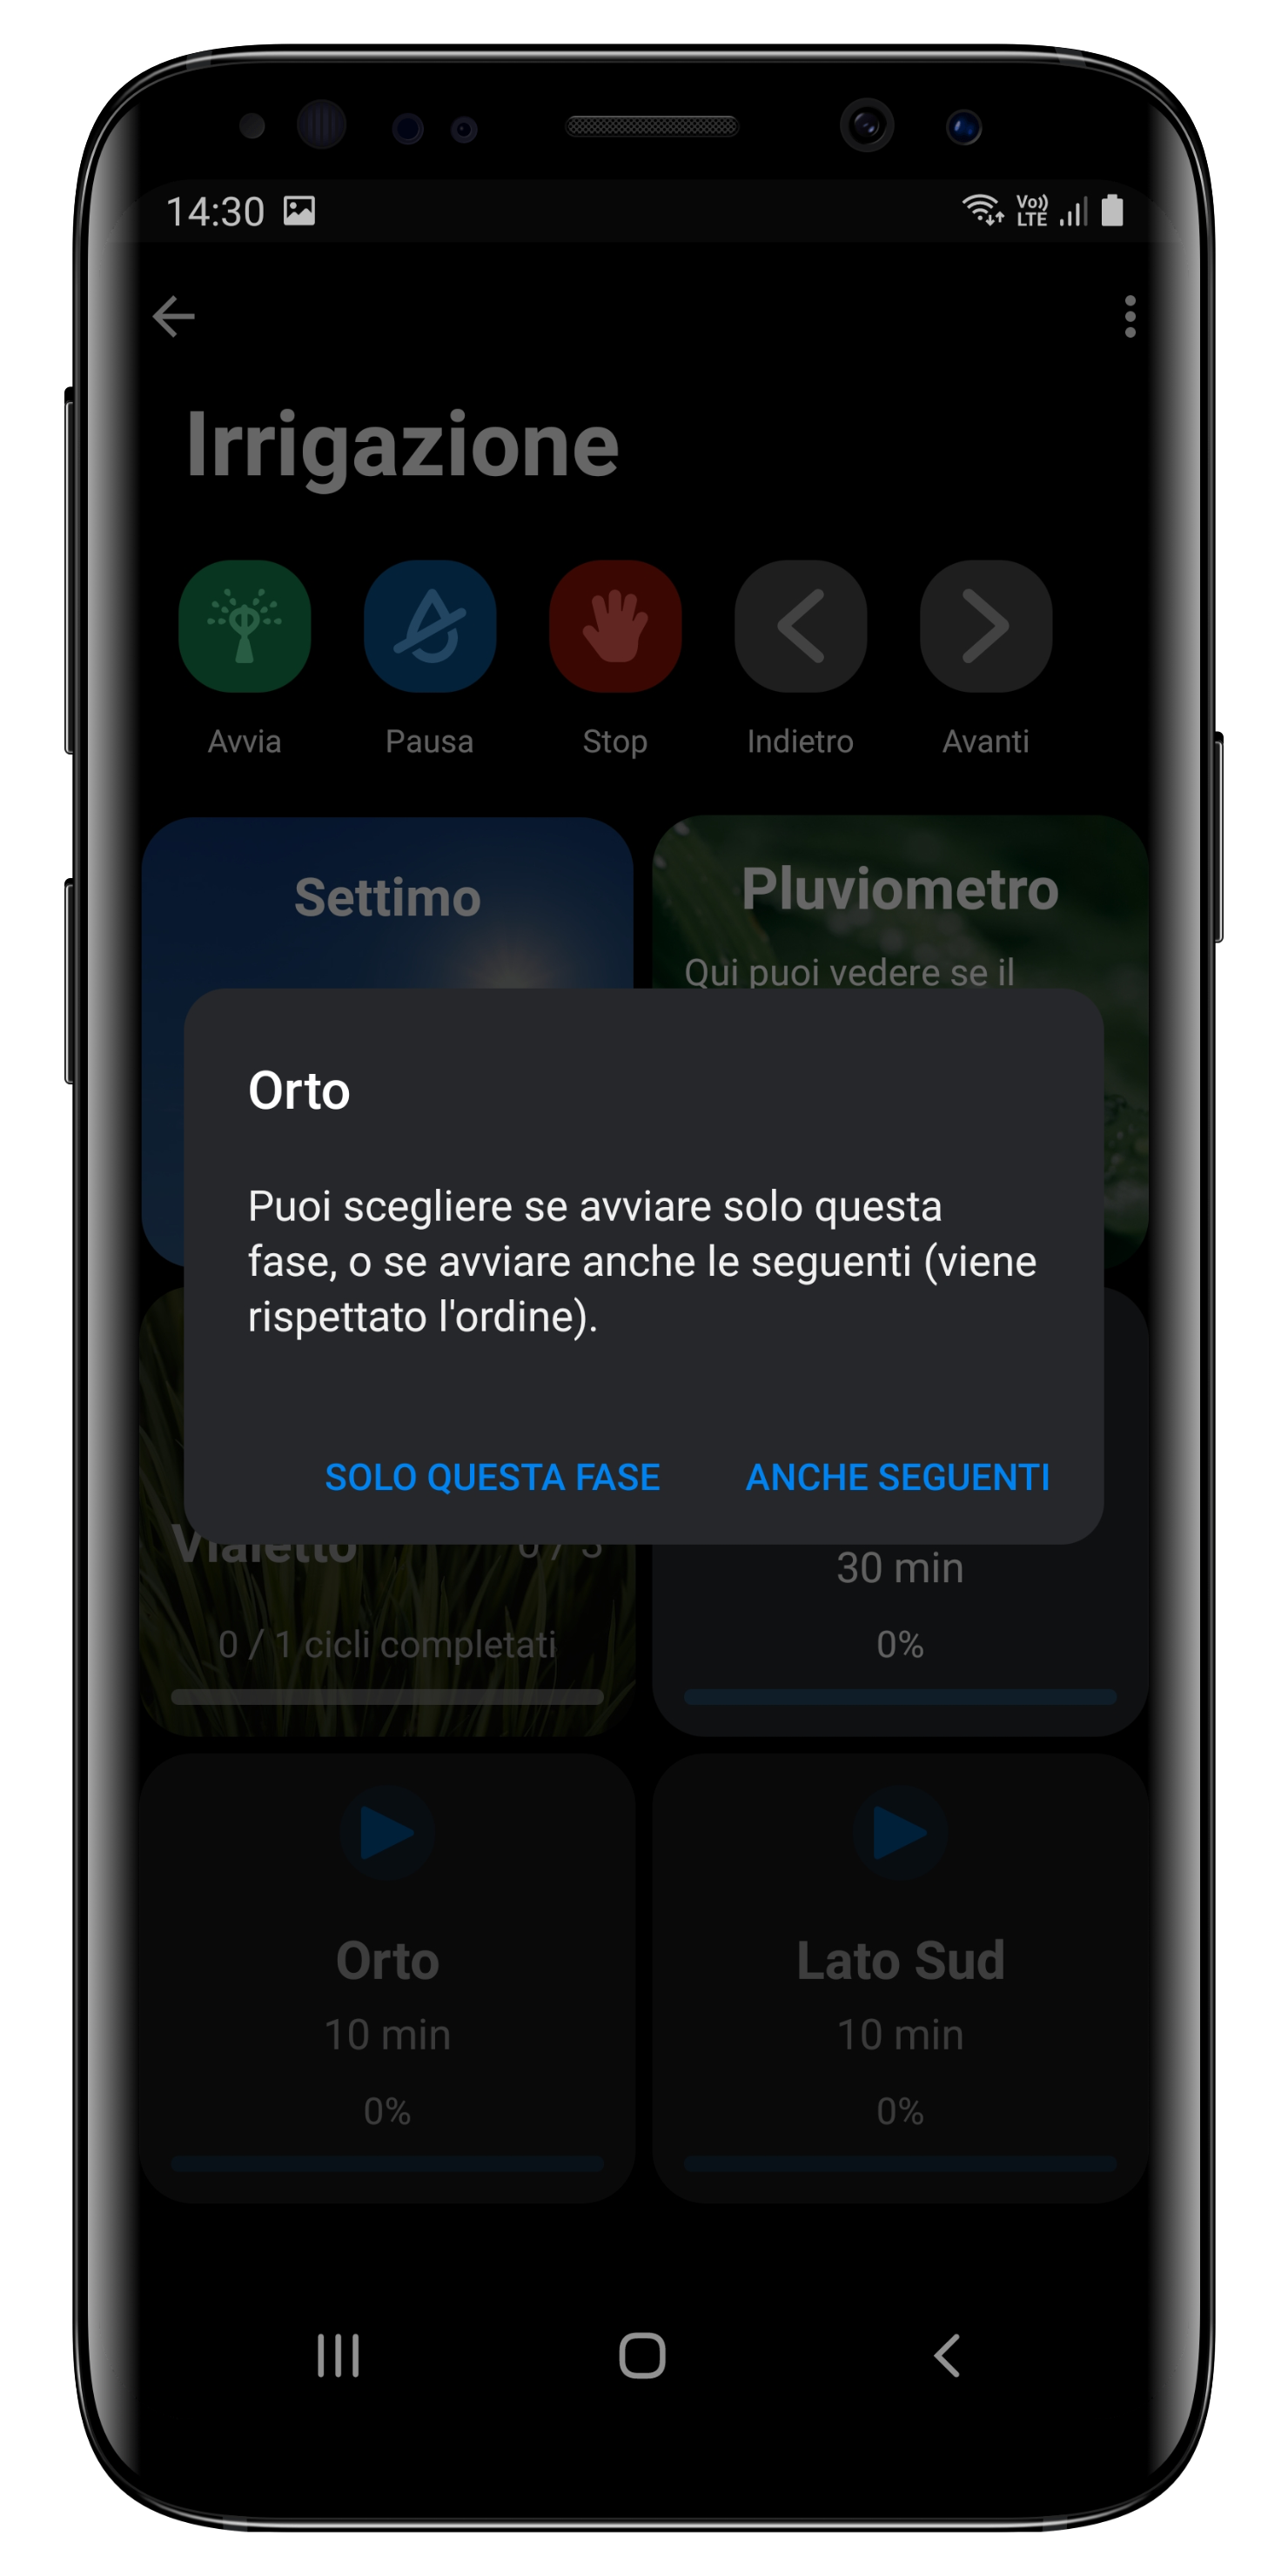
* **Play Button:** if you wish to water a specific area, you can press the *play* button and choose to start only that phase or also the subsequent ones.
* **Name:** The name allows you to distinguish different phases and you can [modify](#modify-the-configuration) it as you wish.
* **Duration:** the phase duration is expressed in minutes, and you can modify it by clicking directly on the value.
* **Completion Percentage:** The percentage value indicates the progress of the specific phase.
### Modify the Configuration
To modify the phase configuration, you need to press the three dots in the upper right corner, then the *Edit* button.
Here are the operations you can perform:
* **Arrange the Phases:** To rearrange the phases, simply press and hold the phase you want to move, then drag it to the desired location.
* **Edit the Name:** click directly on the text.
* **Modify the Duration:** click directly on the value.
Once you have completed the changes, click on the three dots at the top right again, then select *Close Edit* (click the *Cancel* button if you wish to discard them
## Calendar
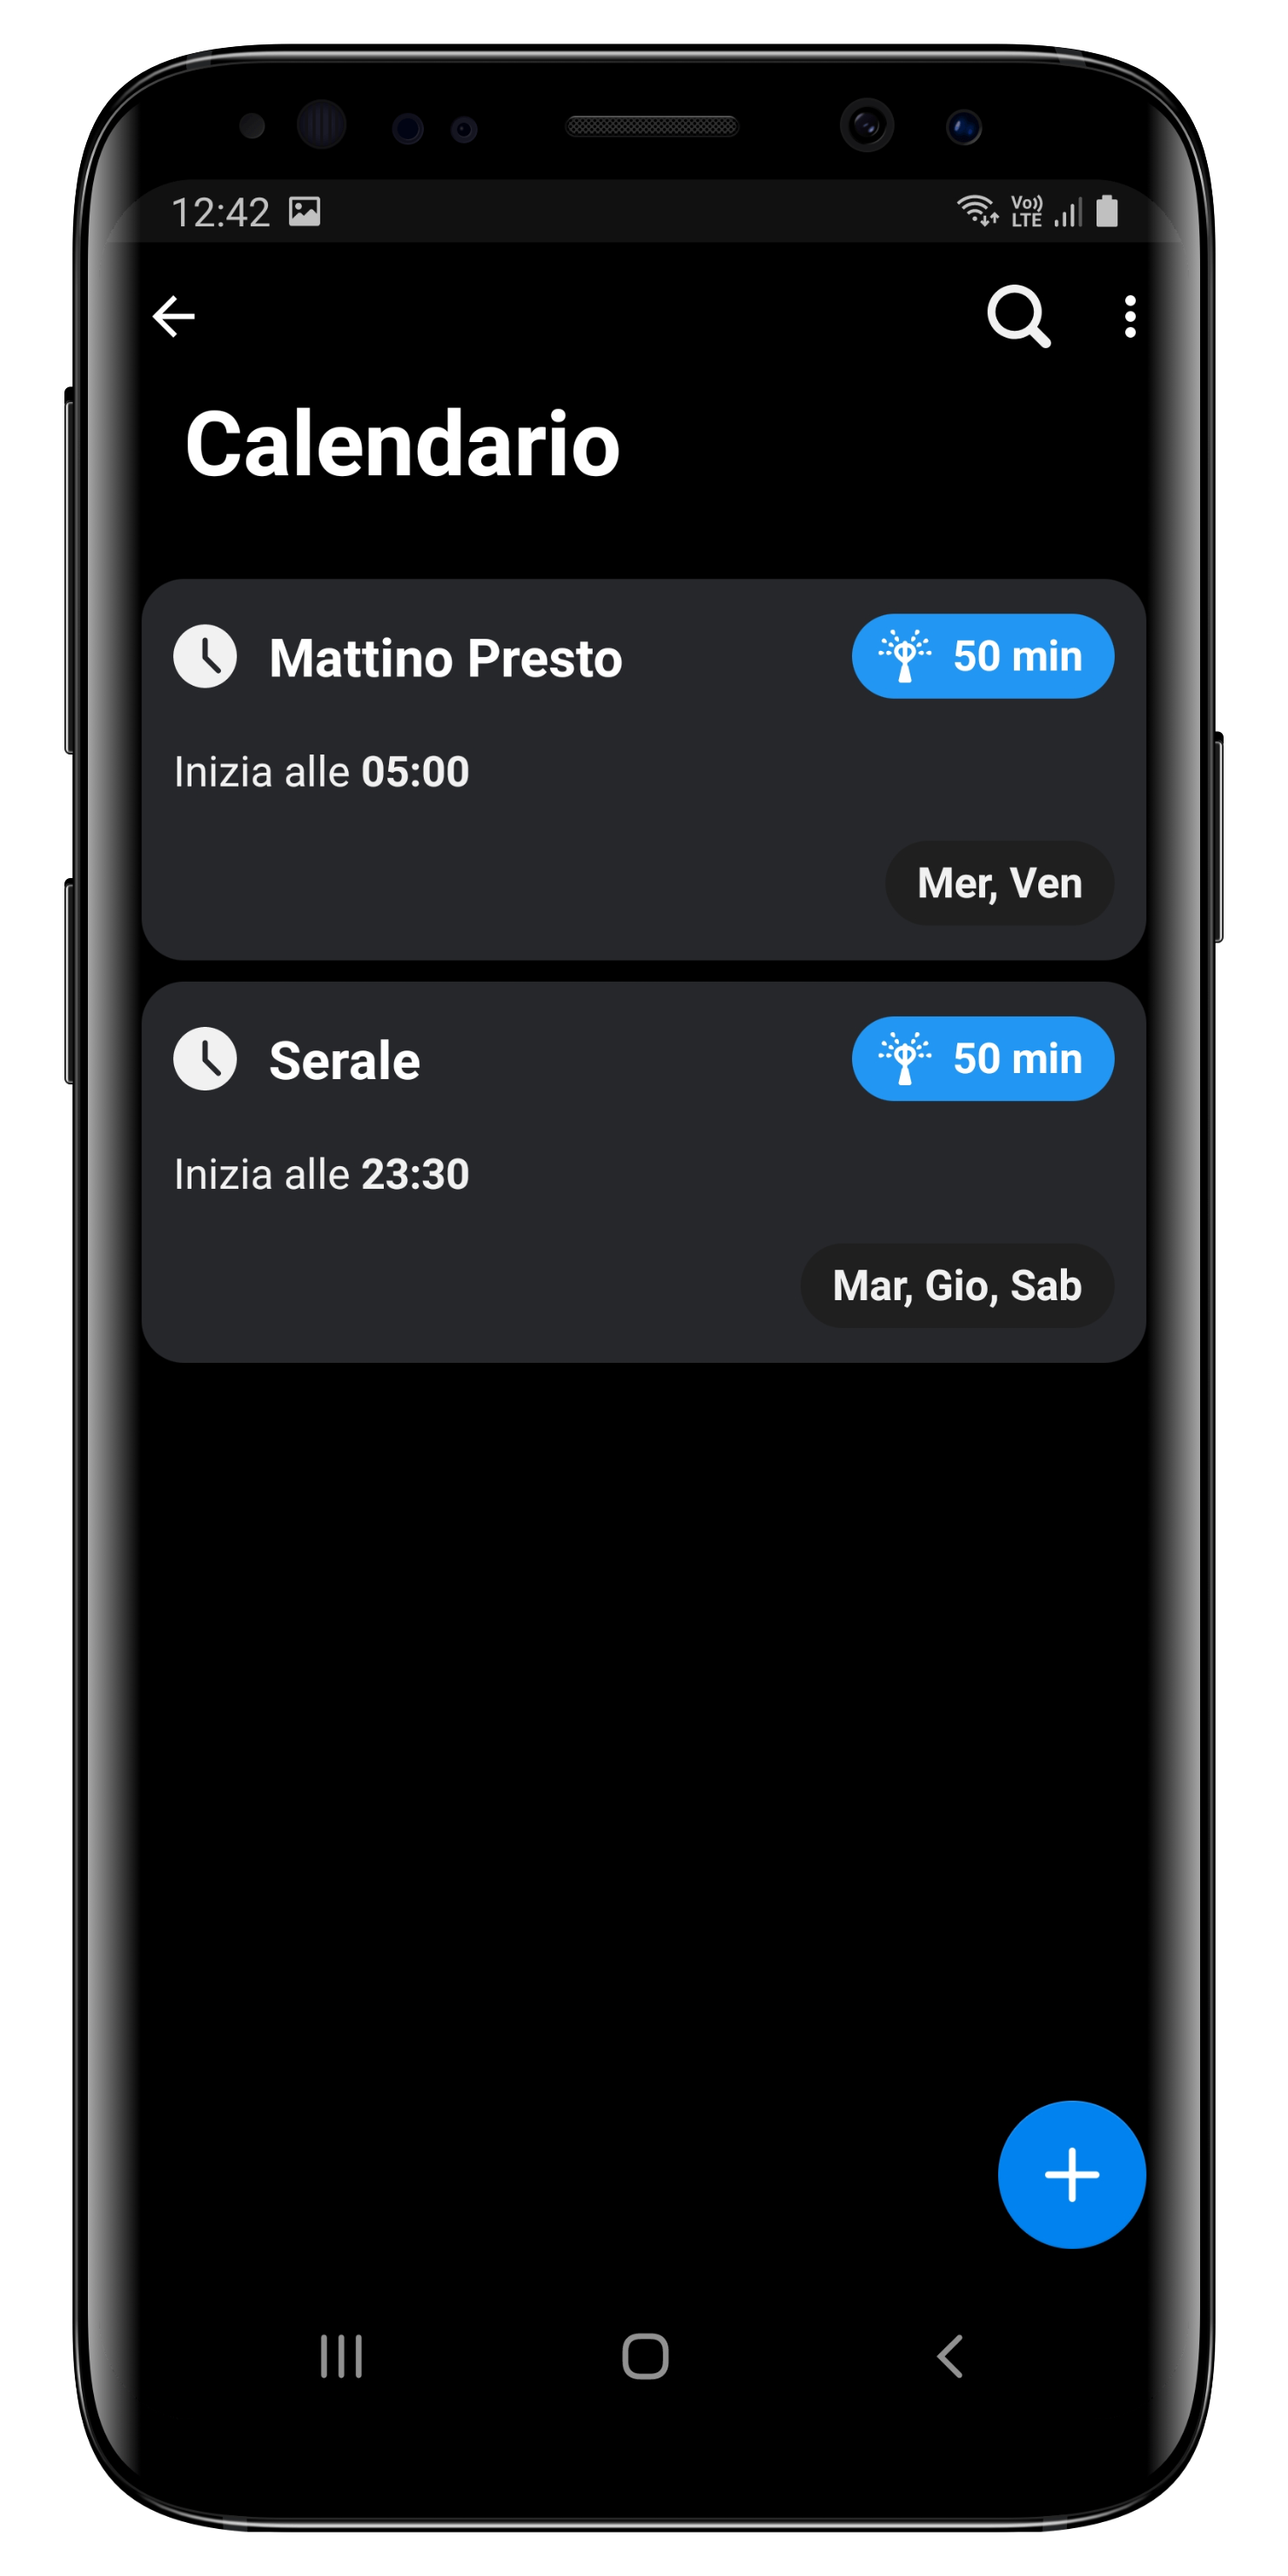
The ideal setup is to program an automatic irrigation cycle, while the *manual* start or stop will be reserved for isolated cases.
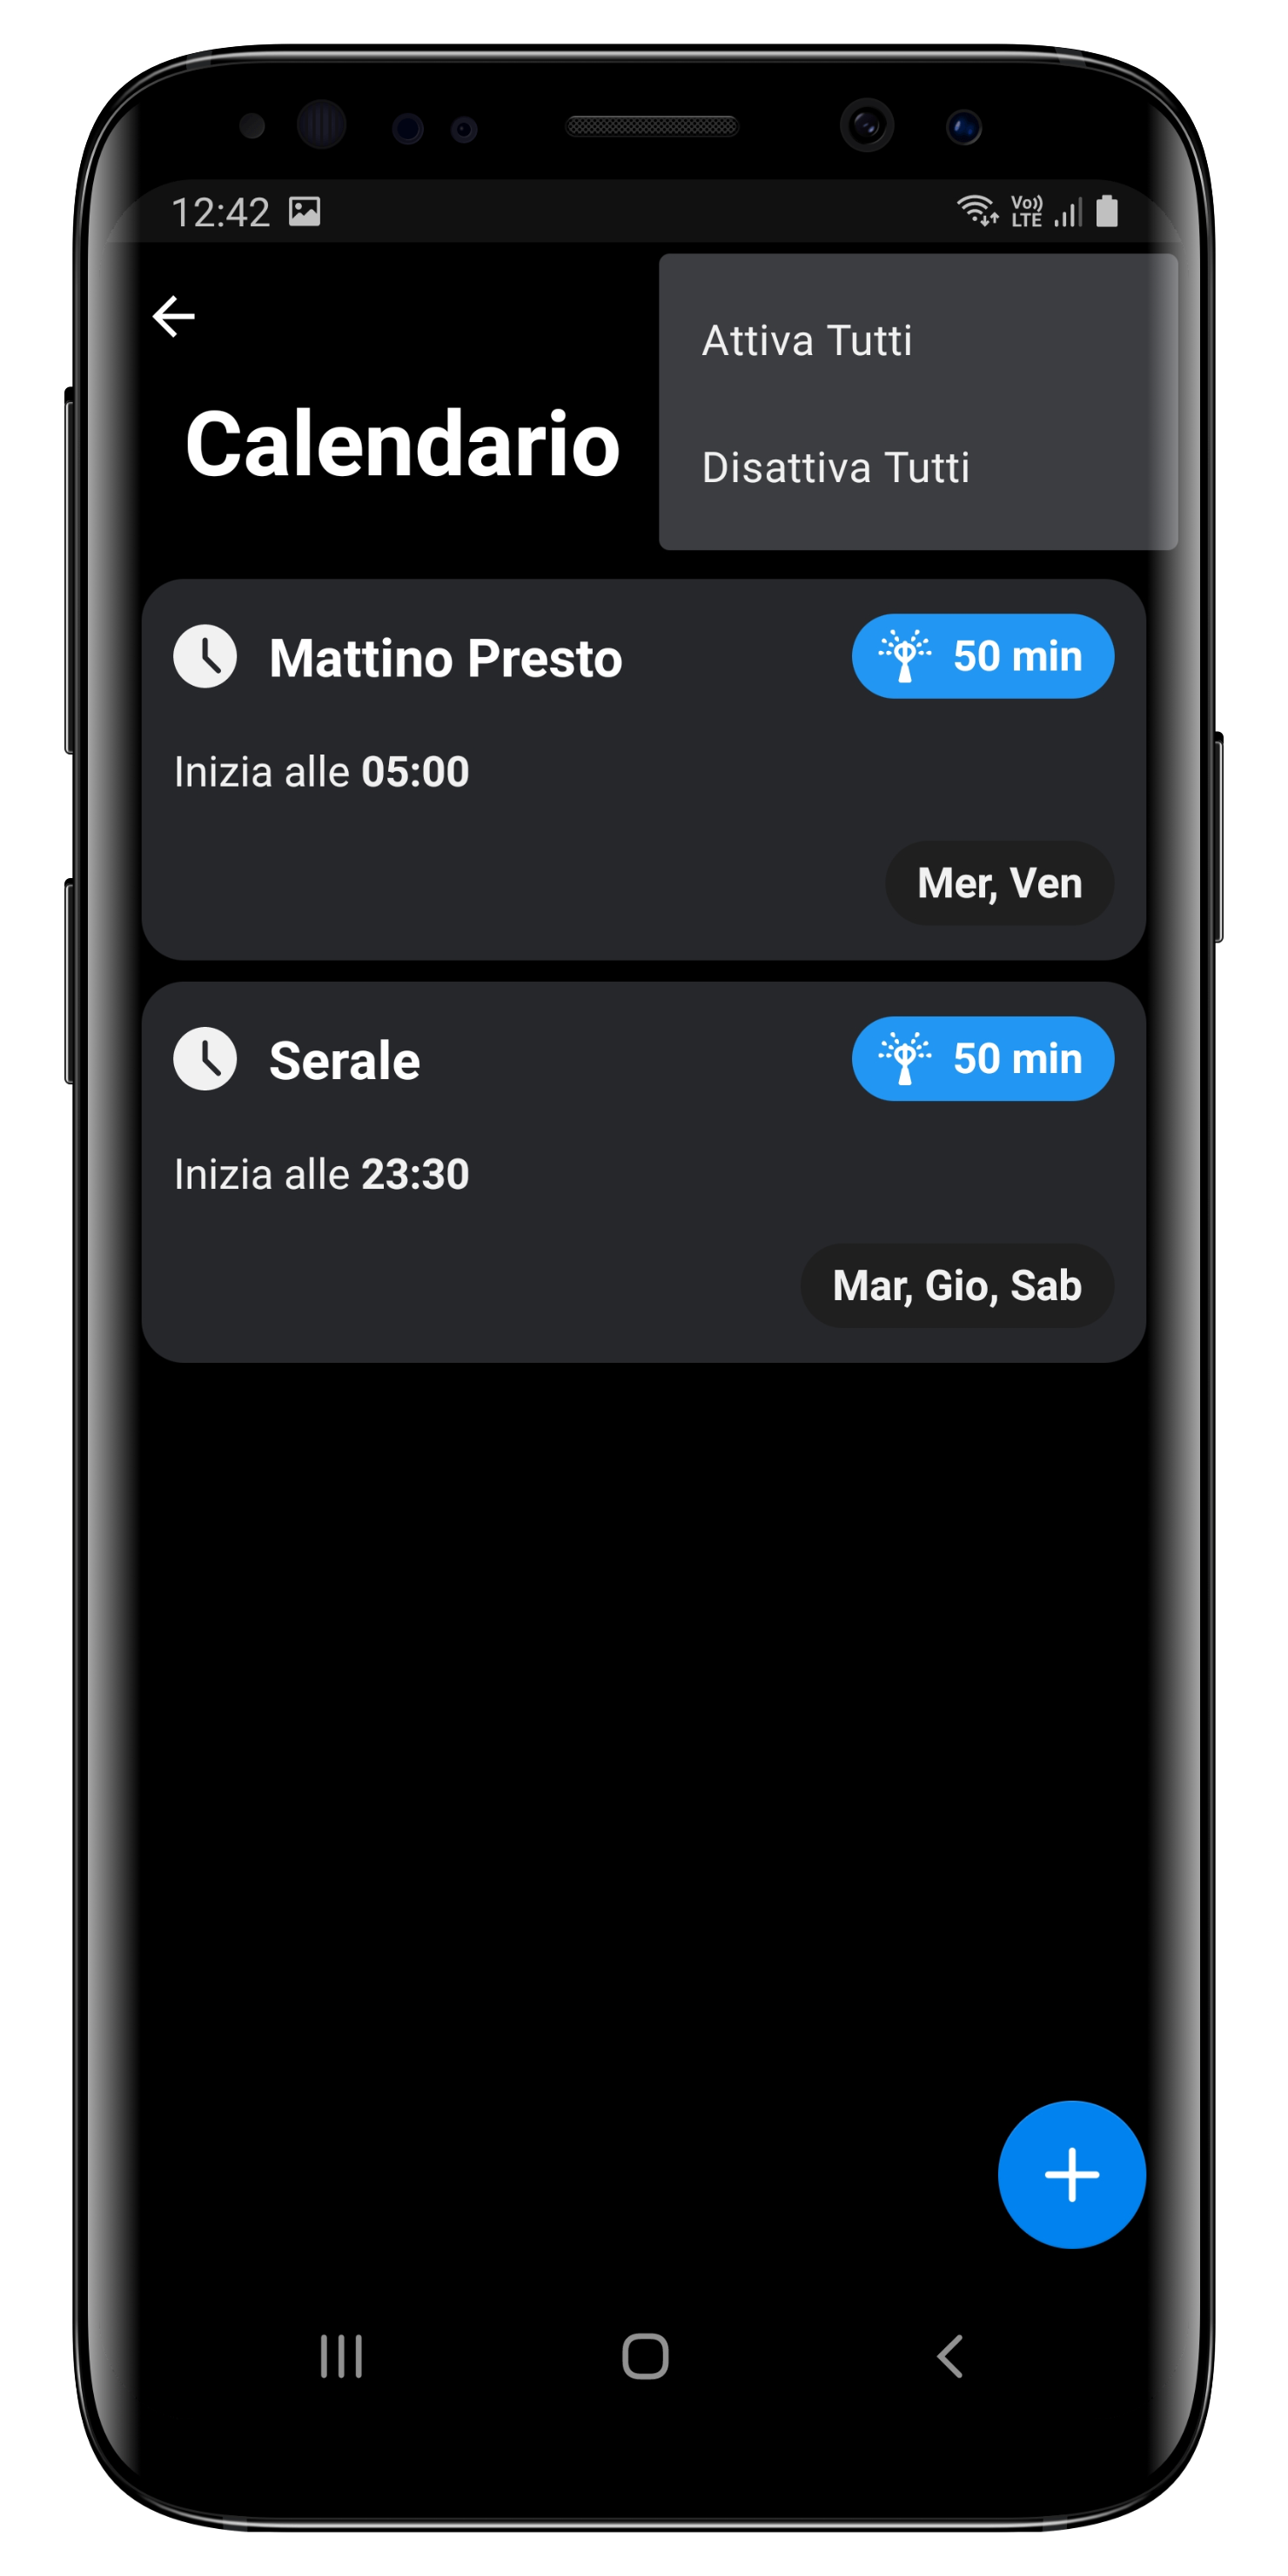
To configure the scheduling, press the button with the three dots at the top right, then the *Calendar* button.
Once you have opened the calendar page, by pressing the **+** button at the bottom right, you can proceed with creating an event; by pressing the three dots at the top right, you can enable/disable all configured events.
### Event Creation
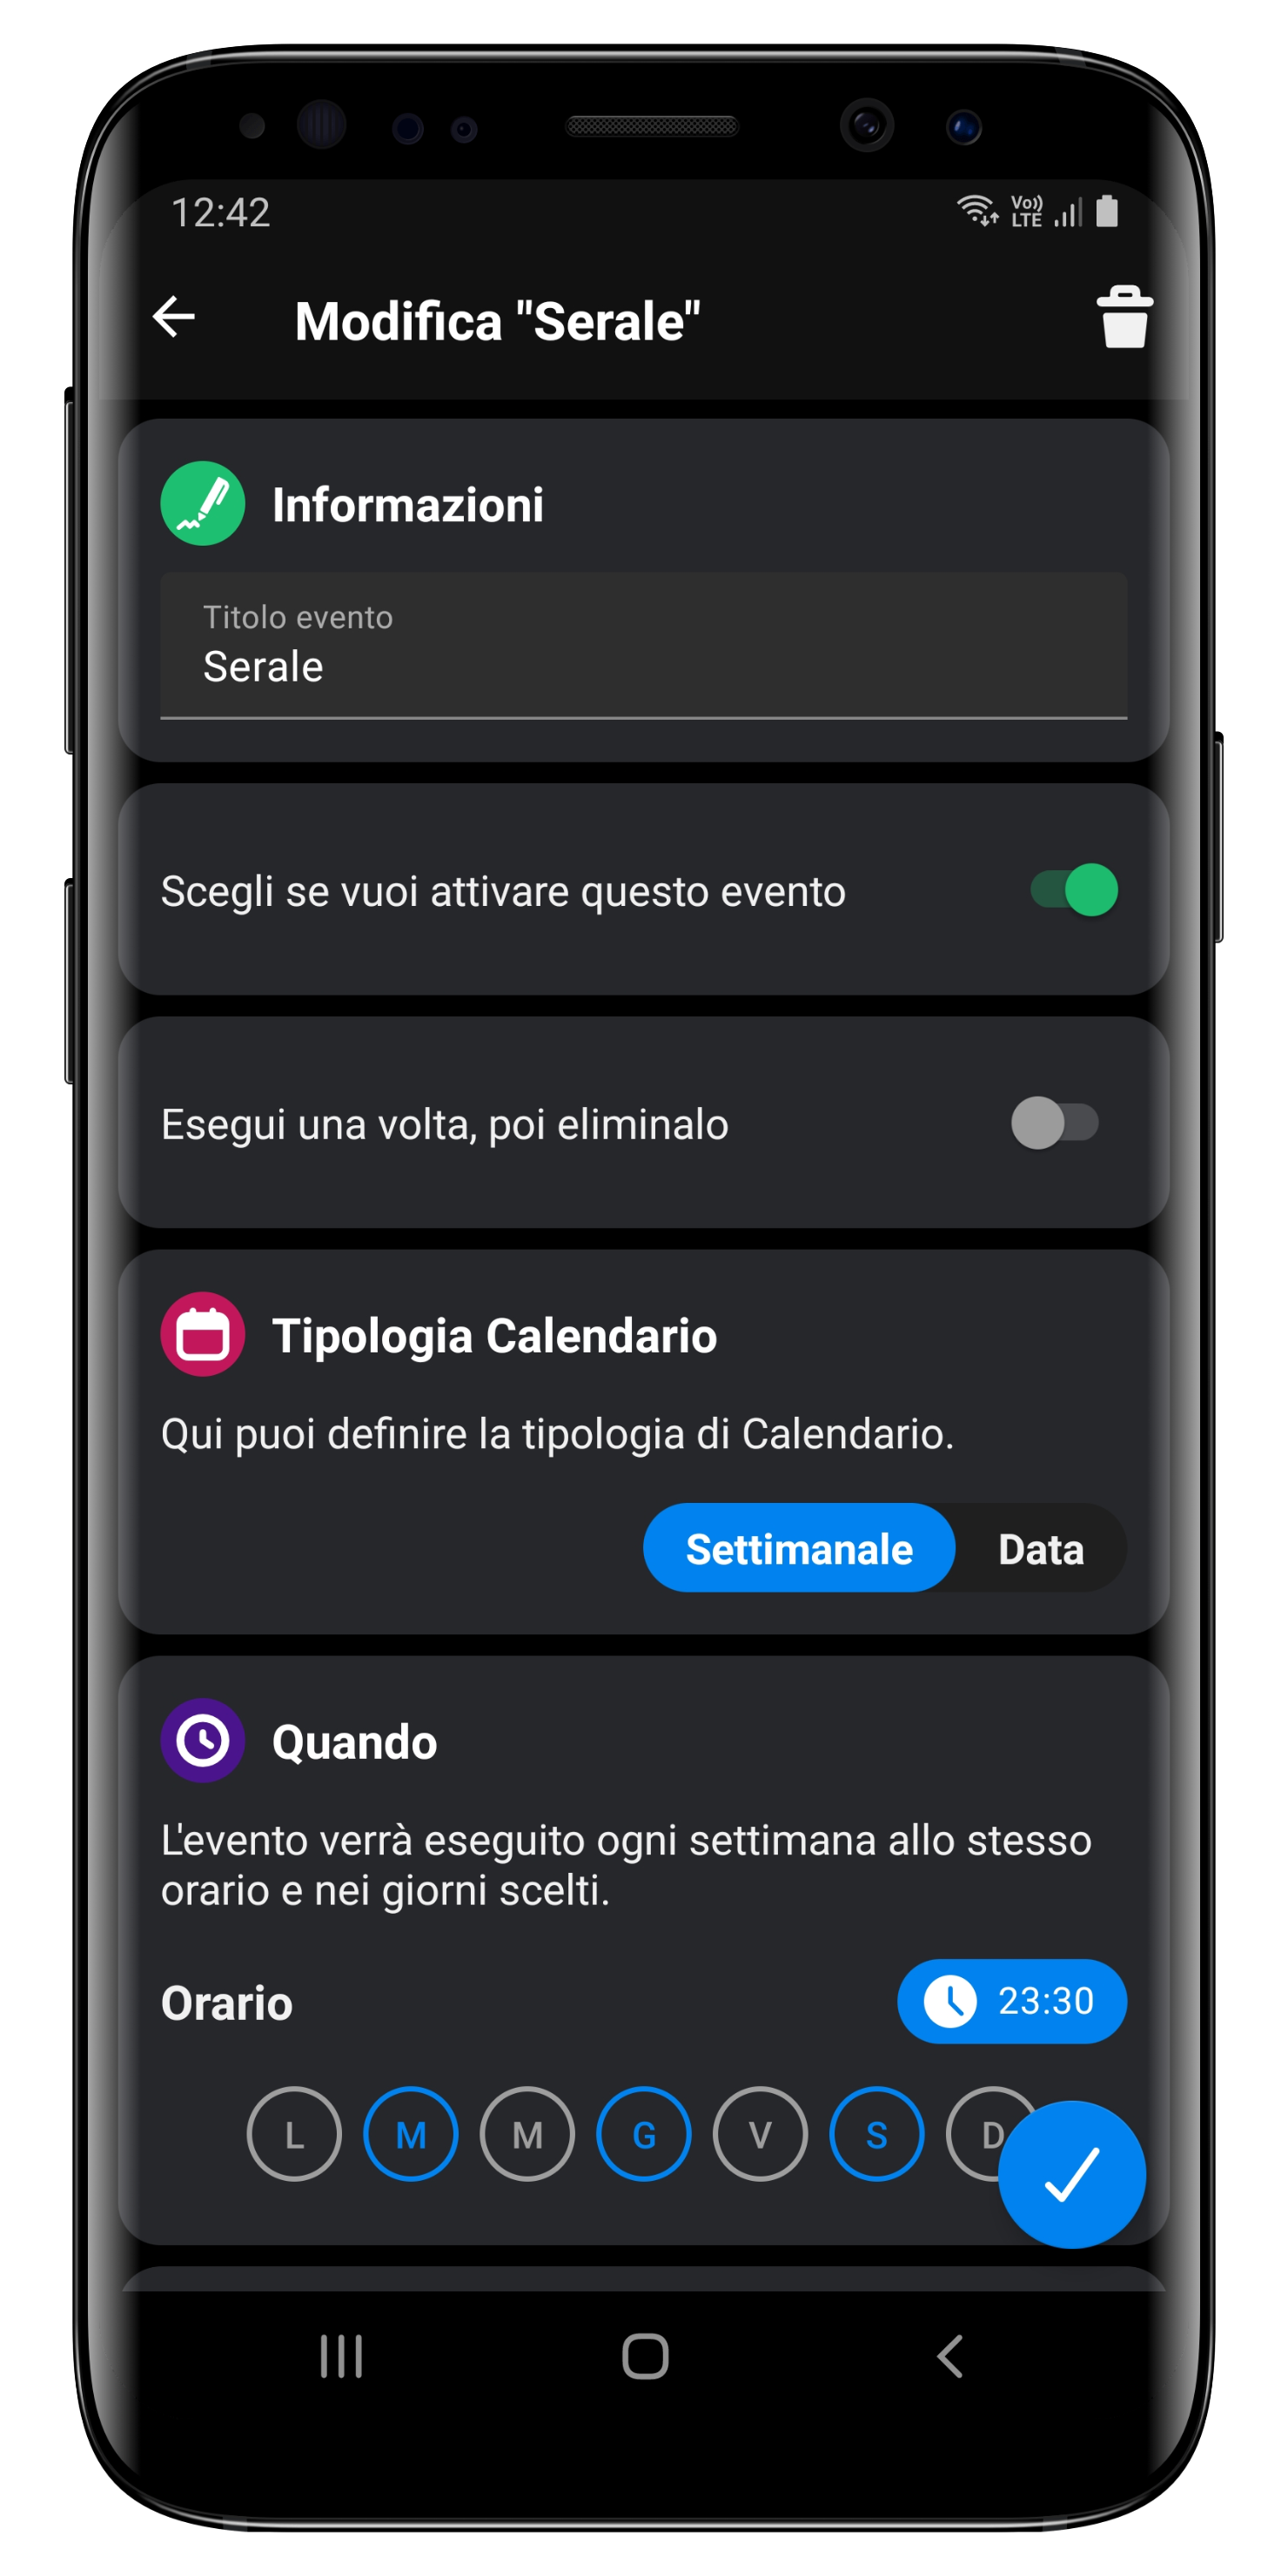
Creating an event is quite simple. It allows you to set a name for the event (e.g., *Evening Irrigation*), define the start time of the cycle, and specify the days of the week you want this configuration to be active.
{% hint style="info" %}
If you wish to irrigate more than once a day, you must create an equivalent number of events.
{% endhint %}
{% hint style="info" %}
To edit an existing event, simply click on it.
{% endhint %}